
How To Create a Welcome Automation
When a customer subscribes to your email list, they express a genuine interest in your products and a willingness to receive communications from you.
It is important that a customer will receive an initial welcome email greeting them about joining your email list, informing them about products or content that they may be interested in, offering them a special discount on their first purchase, etc.
Creating a Welcome Automation
First, you will have to create suitable templates containing the messages you wish the customer to receive as part of the welcome automation.
Click here for detailed explanations about creating email templates.
You may also want to read our article about Creating dynamic coupons if you plan to include a one-time coupon in the welcome greeting email.
Once you've created the necessary templates, click "Automations" on Flashy's top toolbar.
Click "Create Automation".

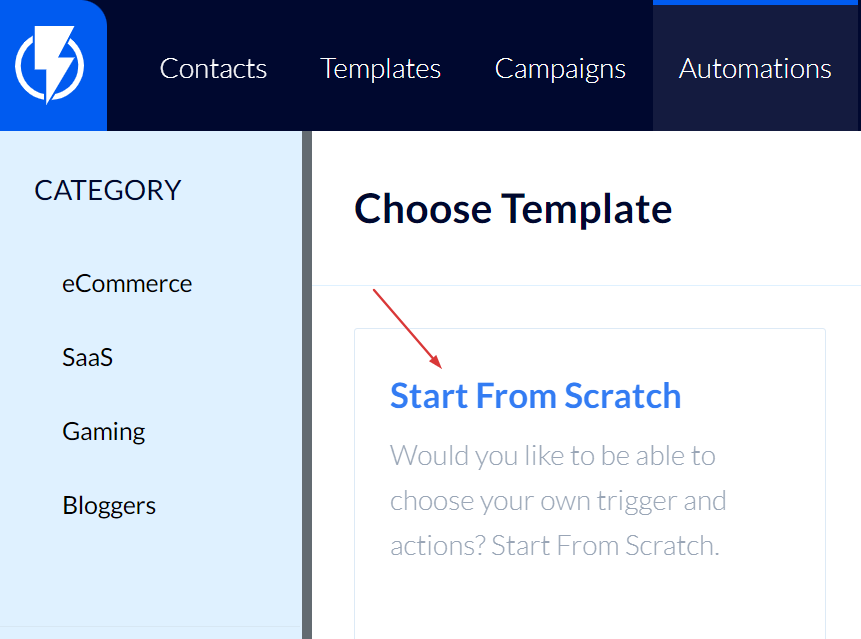
Select the "Start From Scratch" template.
- Please note: in this article, we have chosen to describe creating a welcome email automation from scratch. Alternatively, you may select a ready-made welcome email template and then edit its settings and messages to fit your preferences.
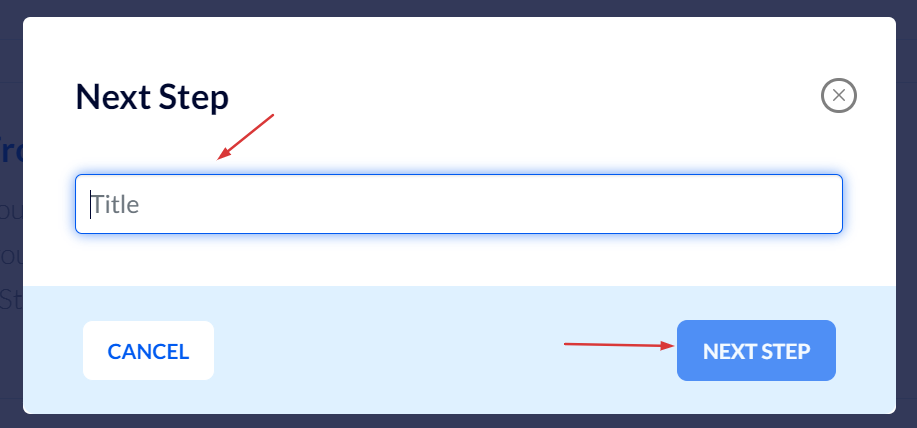
Enter a title for the automation and click "Next Step".
You can now create the automation.
First click "Add Triggers".

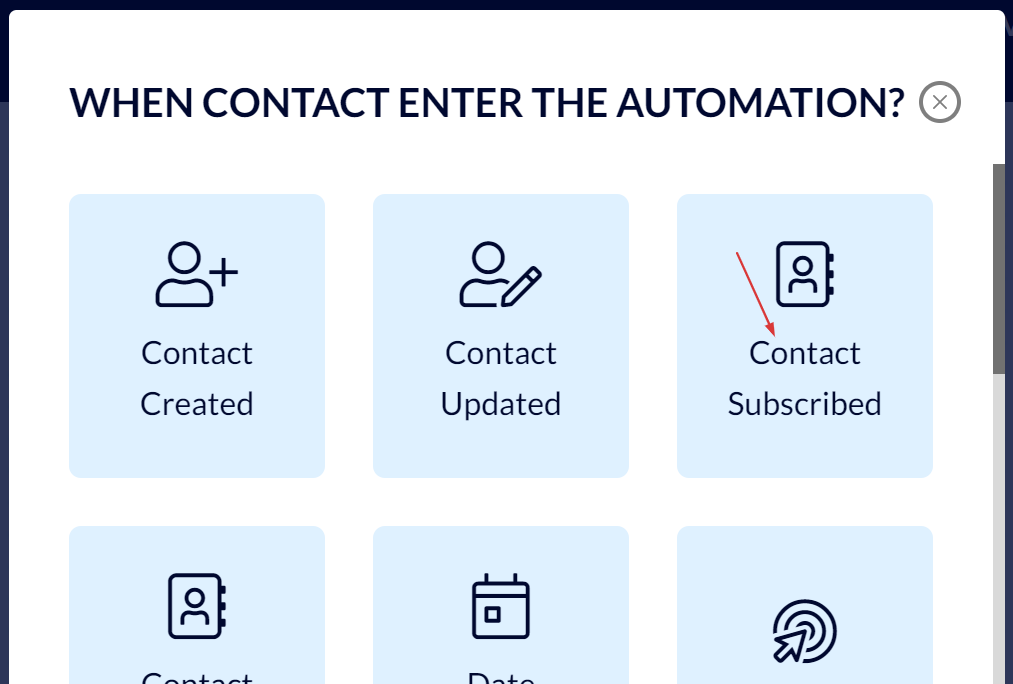
Select the "Contact Subscribed" trigger.
In the menu that opens you must select the relevant email list and the number of times you want the contact to be able to enter this automation.
Finally, click "Add Trigger".

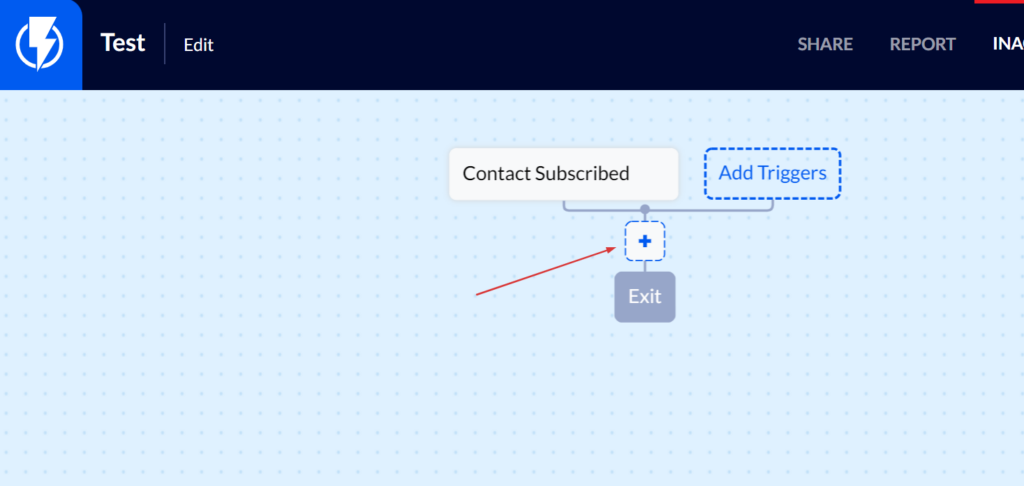
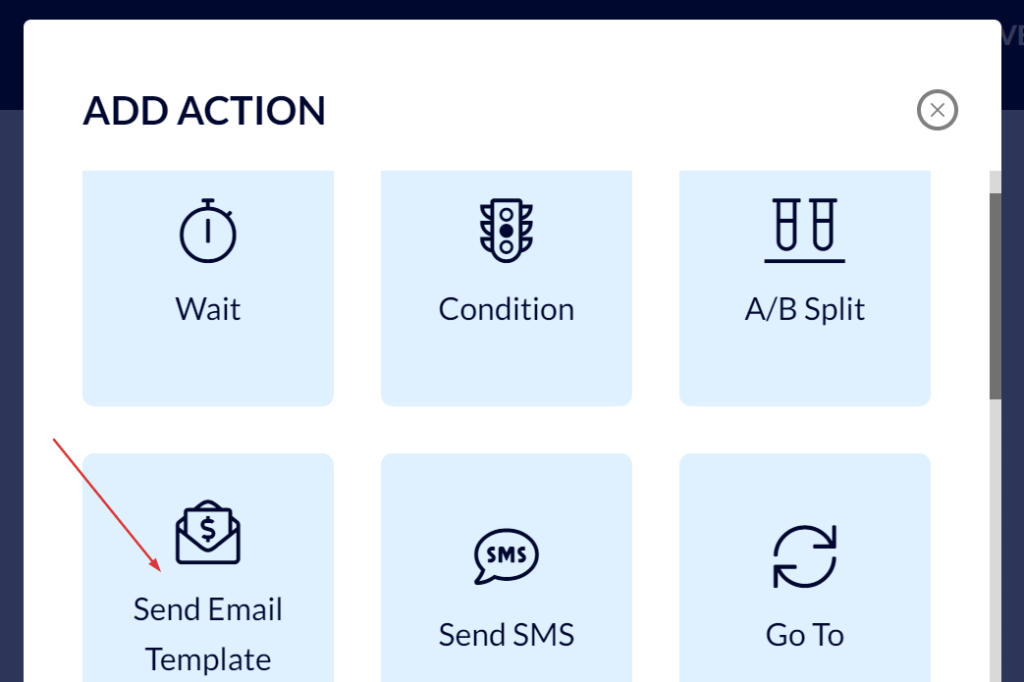
Now, add the action you want to occur once the contact has been added to the email list.
Click the blue "+" button (the button for adding an action).
Select the action you wish to be carried out once the contact subscribes to the email list selected (for instance, an email will be sent to the contact).
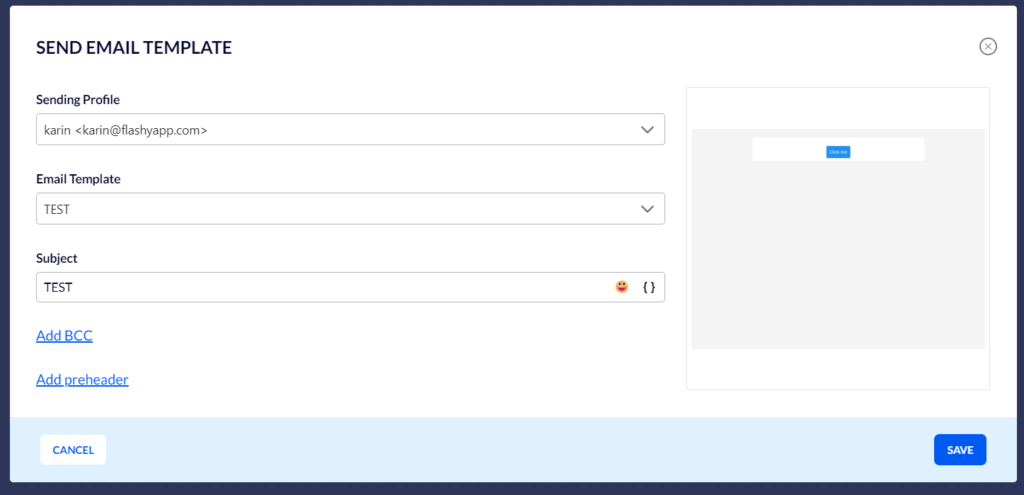
Fill in the following details:
Make sure that your sending profile is up to date.
Select the template you have created for this automation.
Under "Subject", fill in the subject that you want your customers to see as the subject of the greeting email they receive (for instance: "Welcome!").
Finally, click "Save".
In this article, we have described creating a simple automation where customers who subscribe to the email list receive a welcome email greeting them. It is, of course, possible to expand the automation into a customer journey with plenty of options, terms, and actions that you set for the customer to undergo in their journey. For instance, if the customer does not make a purchase even after receiving a complete set of messages – send them an SMS, etc.
Once you complete creating the automation, you may give it a test run to make sure it works properly before activating it. Click here for instructions on how to test an automation.
After testing the automation, activate it by clicking the blue activation button at the top right part of the screen.

