
Popups Troubleshooting
If you find that a popup you’ve created is not displaying correctly on your website, there are a number of troubleshooting steps that can help you find and address the issue. This article covers each of these steps in detail; we recommend trying them in the order laid out here.
First, go to Popups in your Flashy dashboard at the top of your screen. Find the popup you’re having trouble with (or that you want to verify is working correctly) in the list and click to open it up.
Pixels
In order for the popup to appear, your website needs to contain Flashy’s pixels. Pixels are a type of code that enables your popups to show at the right time and in the right place on the site.
The best way to verify whether your site contains Flashy’s pixels is to do a browser preview of your site. Click on Preview in the top right corner of the screen and select “Browser Preview” from the drop down menu. If “Browser Preview” is not listed as an option, it means that you have not yet added your website URL to the Flashy site. We strongly recommend doing so, as it makes it easy for you to test and preview popups on your site. Please see our article on updating your account information for instructions.
After adding your website URL to your profile, you should now see “Browser Preview” as an option in the Preview menu; click on it to preview your site and see if the popup appears correctly. If not, it means your site does not yet contain Flashy’s pixels. Please see our install guides for WooCommerce and Shopify for instructions on how to integrate correctly with Flashy, which should take care of the pixels issue.
Activate Popup
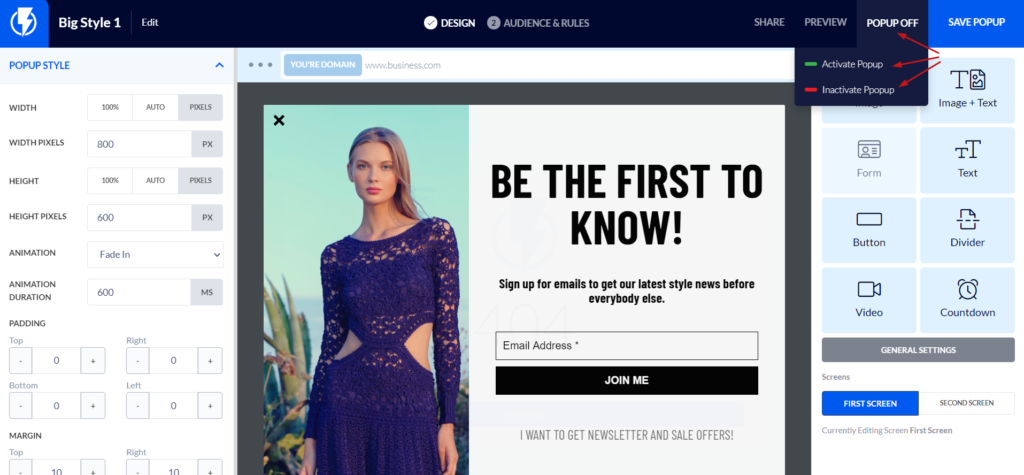
If the pixels are installed but your popup still isn’t showing, the next thing to check is the on/off status of the popup. When viewing your popup, look at the top right corner of the screen. If it says “Popup Off,” click there and select “Activate Popup” to turn it on.
Audience and Rules
The next step is to go into the Audience and Rules section at the top of the screen, and then into Triggers and Targeting. Make sure that you’ve chosen who you want to display the popup to and on what devices. Also, choose the timing for displaying the popup (for example, after a visitor has been on your site for 5 seconds).
Advanced Filters
Next, go into Advanced Filters at the top of the screen to make sure there aren’t any filters turned on that are preventing the popup from being shown. Remove filters by clicking the red X to the right of the filter.
Personalization
The Personalization section is the next place to check (to the right of Advanced Filters). Make sure there aren’t any personalization settings limiting the popup.

Testing
After completing the above steps, you can do a test to see if the popup issue has been solved.
The best way to perform the test is by opening an incognito window. Click on the Chrome browser and select “New incognito window.” Make sure that there’s only one incognito window open; multiple windows can cause inaccurate testing. Then, simply go to your website and see if the popup is working properly. Doing so through an incognito window will make you appear as if you are a visitor to your site, and will allow you to see exactly what your visitors see.
Hopefully, going through these steps will solve the issue for you, and your popup will be up and running again in no time. However, if you’re still experiencing trouble, please reach out to us at support@flashyapp.com and we’ll be happy to assist you.
