
Creating and Managing Automations
With Flashy's automations you can easily and automatically communicate with your customers according to their behavior.
Define marketing funnels for various scenarios, when a customer meets the terms you set for the automation, they will pass through the customer journey in the channels you select with no manual intervention on your behalf.
You can benefit from the ease of using automations for advancing any of your marketing goals!
Creating an Automation
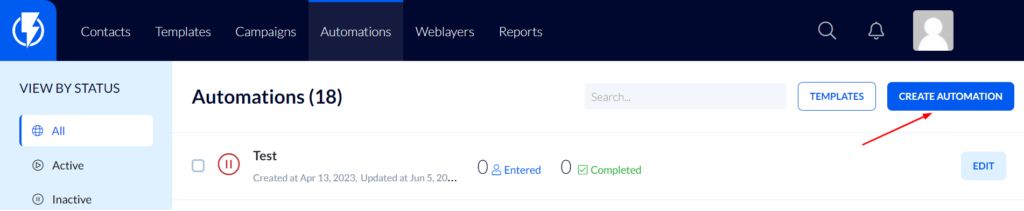
- Click "Automations" in the top toolbar.
- Click "Create automation".
On this screen, you can see all the ready-made automation templates that Flashy offers for eCommerce websites.
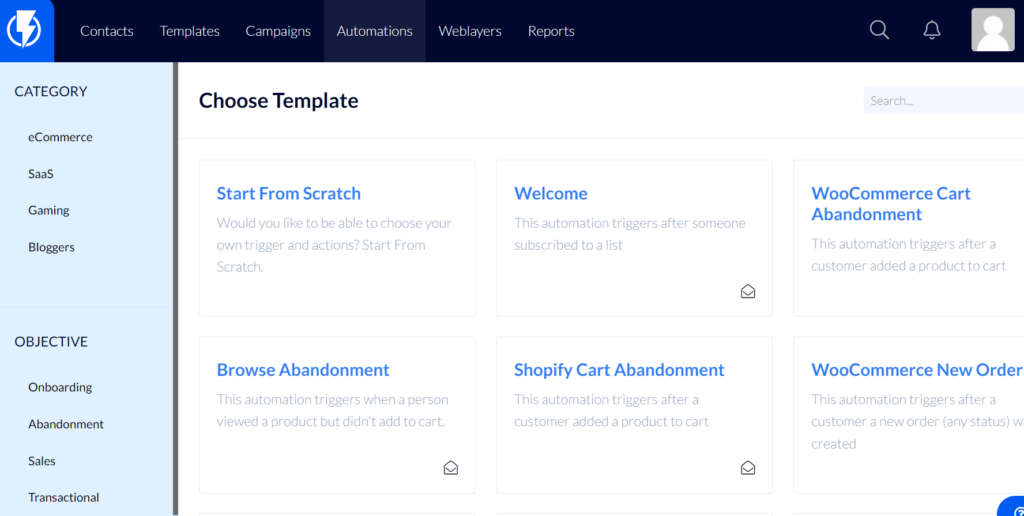
You can select a ready-made template, modify it to fit your business, or you can create a new automation from scratch.
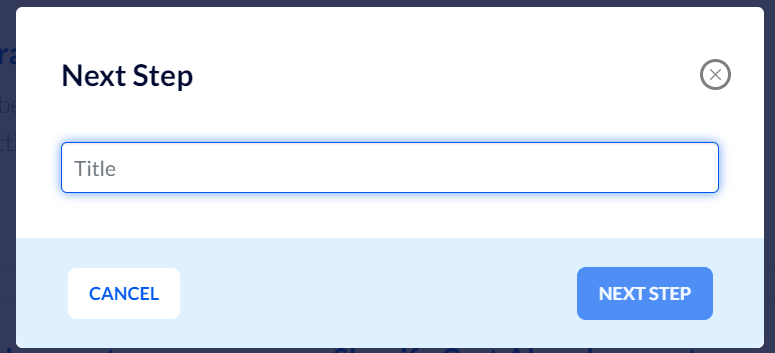
Fill in a title for the automation and then click "Next Step".
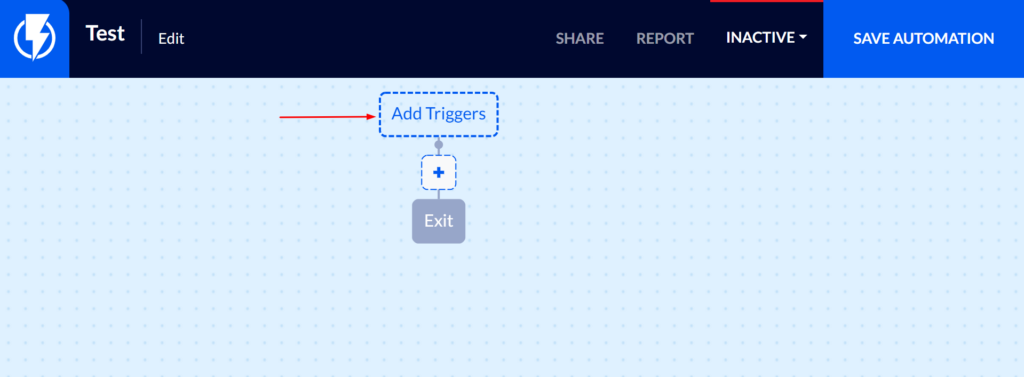
You have entered the automation editor. Here you can create the customer journey you want by using triggers, filters, and actions.
Trigger – an action that the client carried out or refrained from doing, causing the automation to begin.
Filters – parameters determining which customers will enter or proceed with certain automation.
Action – an action you want to see happen once a trigger has been met.
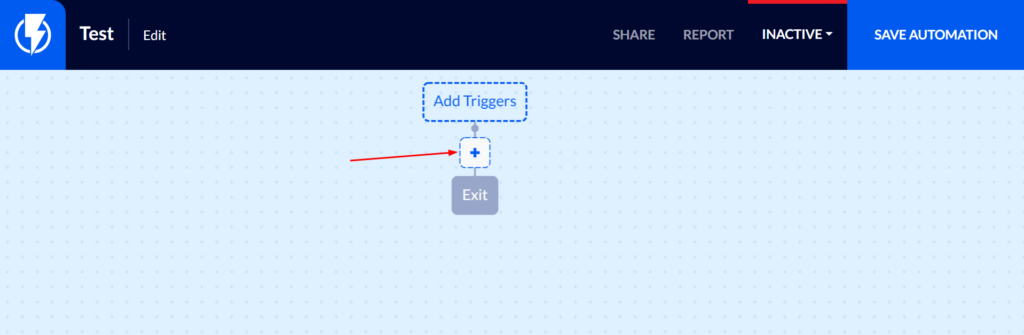
To create a trigger in an automation click "Add triggers".
You can read this article for more information on trigger options.
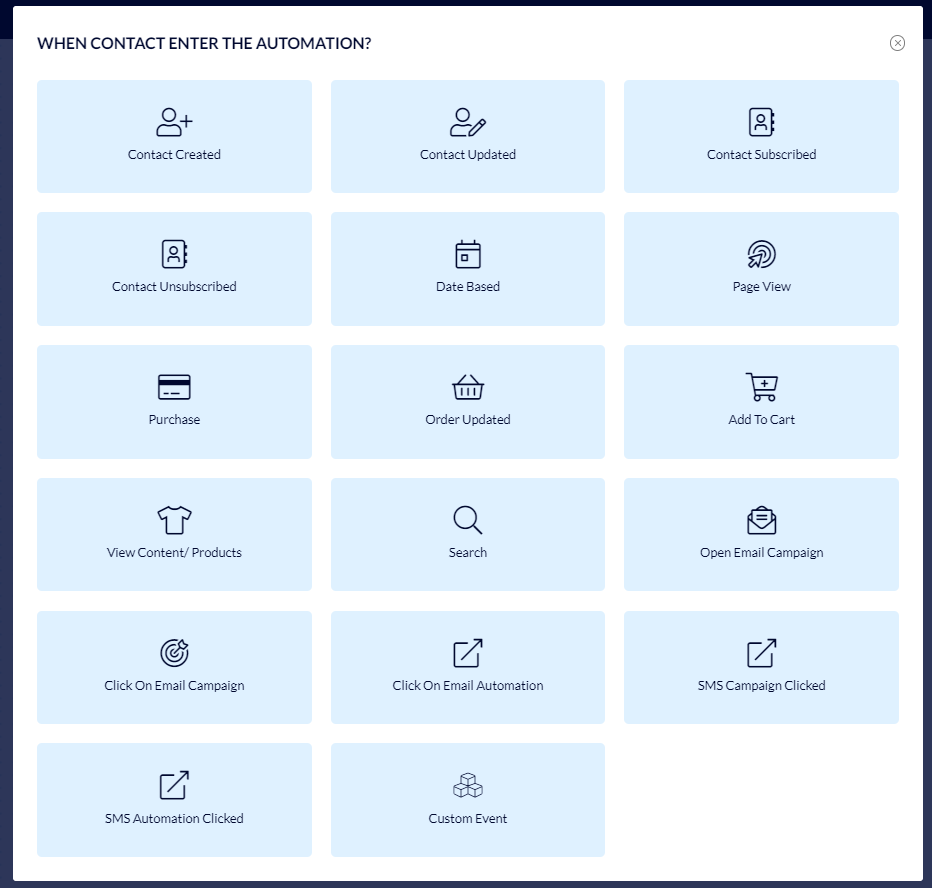
On this screen, you can see all the possible triggers on an automation.
Select the trigger you want and fill in the trigger options on the screen that opens.
Adding a filter on an automation:
Select the appropriate filter from the categories that appear for each trigger (you may search for the desired filter using the free-search box).
This means that a customer will enter the automation only if they meet the conditions of the trigger and the funnel filter you have set.
You can read this article for more information about filter options.

To add an action on an automation:
Click the "+" icon on the automation.
On this screen, you can see all the possible actions on an automation.
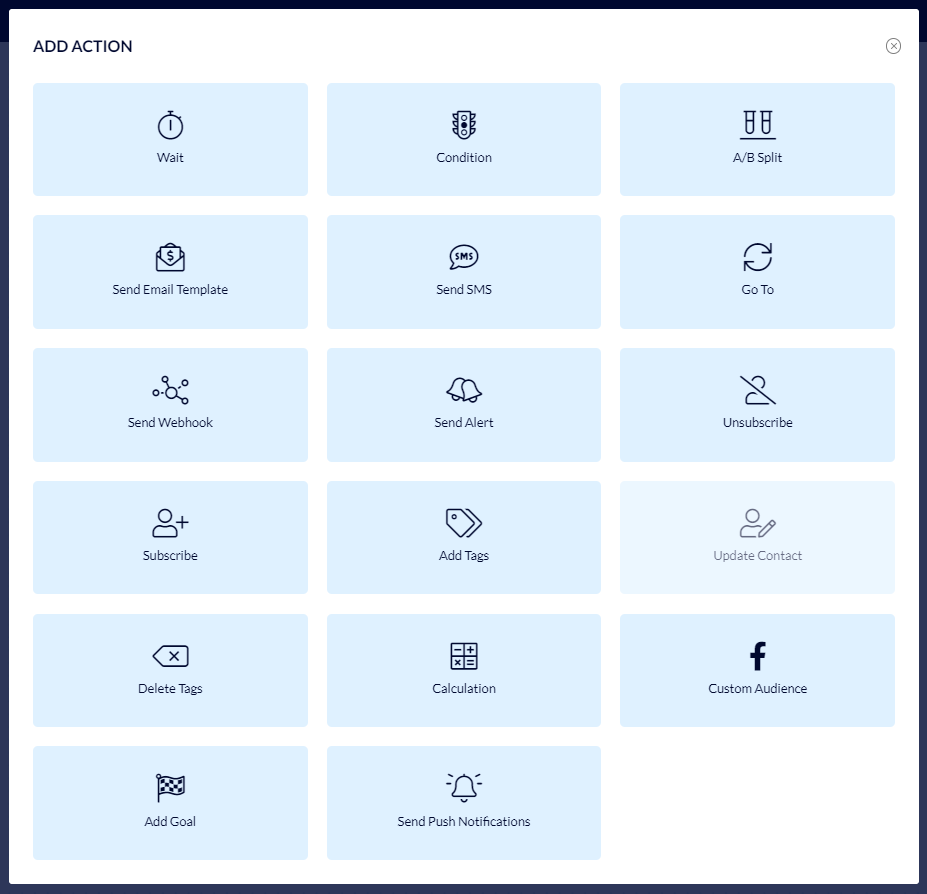
Select the action you desire and fill in the fields on the screen that opens.
You can read this article for more information about action options.
- Once you finish creating the automation journey (setting triggers, filters, and actions), you can give the automation a test run before activating it, to make sure everything is in order: the messages are correct, appear as you intend them to, and in the right order.
Click here to read the article on how to test an automation before activating it.
Managing Automations
You can view all the automations you have created by clicking "Automations" in the top toolbar.
As you hover over each automation four action buttons will appear beside it, on the right-hand side.
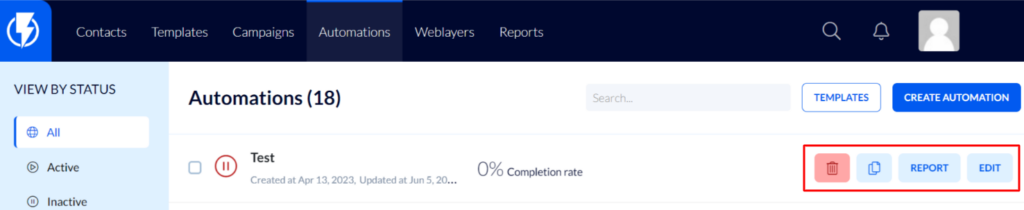
Erase: Use this button if you wish to delete the automation.
Duplicate: Use this button if you wish to duplicate the automation (create another one just like it).
Report: Use this button to view the automation's report.
Edit: This button opens the automation in the automation editor.
