
How To Perform A Domain Verification On Flashy
Verifying a domain on Flashy is fairly simple, make sure to follow the steps below in-order which will ensure that your domain is verified without any issues.
However, if at any point you are feeling overwhelmed or confused do not hesitate to contact our support team and we will do our best to help you with the process.
Please note: These steps must be followed in-order, without skipping any.
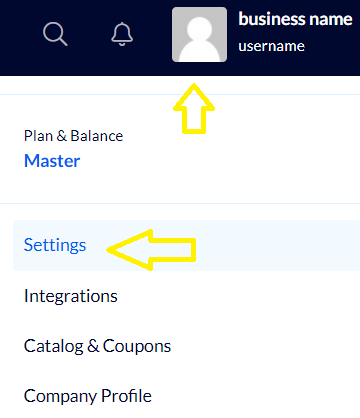
1. In your Flashy dashboard, click on your account icon > and then on "Settings":
2. If you have created a sending profile in Flashy, you must delete it before proceeding to the next step.
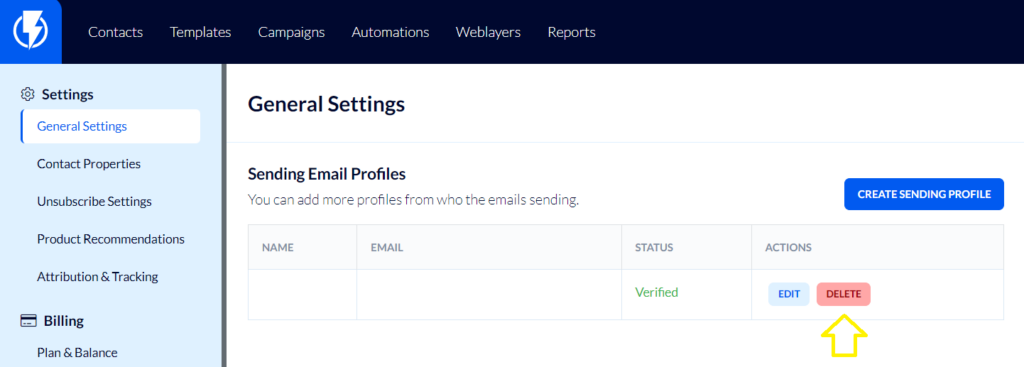
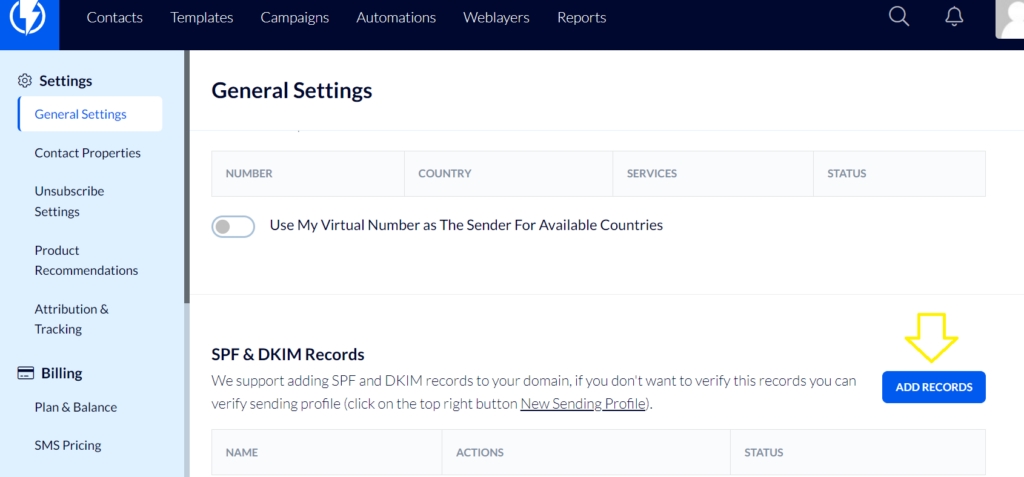
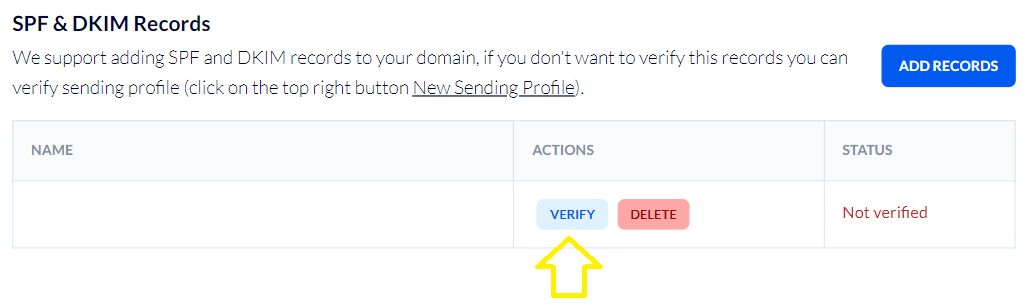
3. After deleting all the sending profiles in Flashy, click on the "Add records" button under the section for "SPF & DKIM Records" at the bottom of the page.
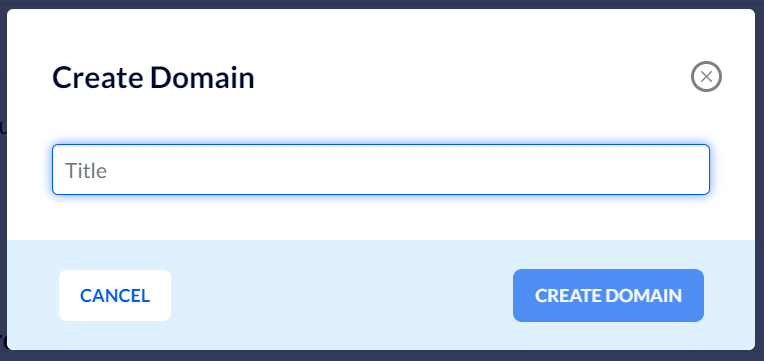
4. Under "Create Domain" enter the domain name (your website address) and click "Create Domain".
Important!
Make sure that you enter the domain only, without any "www" or "http/s"
Example:
mydomain.com - Correctwww.mydomain.com - Incorrect!
5. For the technical part, you may need to involve your IT manager or hosting services representative. Here’s how to invite them to the account, alternatively simply copy-paste the entire records screen and send it to them(ideally with a screenshot).
The individual responsible for managing your DNS records will need to take all the records that are shown on this screen (they will appear with an "unverified" status) and insert them into the appropriate location within your DNS, depending on the type of record, as well as the name and value that is displayed on each line of this screen.
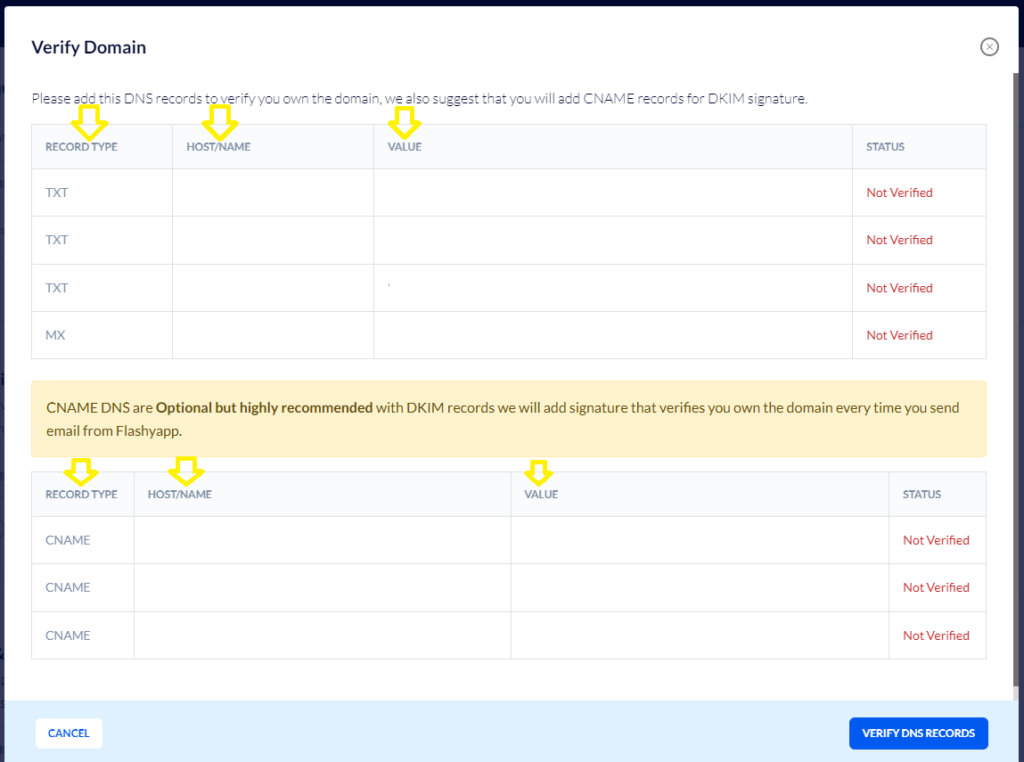
Please note: It is essential to go through each record on this screen without skipping any, doing so is necessary for the verification process to succeed.
In cases where there is a "TTL" field to add, enter the value of "3600".
The TTL value applies to all the records that appear on screen.
Some platforms don't let the user change the TTL value, in which case continue without it.
6. After adding the records to the DNS, wait a few hours for updates (we recommend waiting about 2 hours, this could take longer if the TTL value was not available to set as it varies between hosting services typically the maximum is 24 hours).
Additional verification of DMARC record
7. After adding all the records which appear on the list, you will now need to add a single record for dmarc which doesn't appear on it.
To add it use the following details
Record type:
TXT
Host/Name:
_dmarc.mydomain.com
Value:
v=DMARC1; p=none;
TTL Value(if applies):
3600
8. To return to the screen that displays the records, simply click on "Verify":
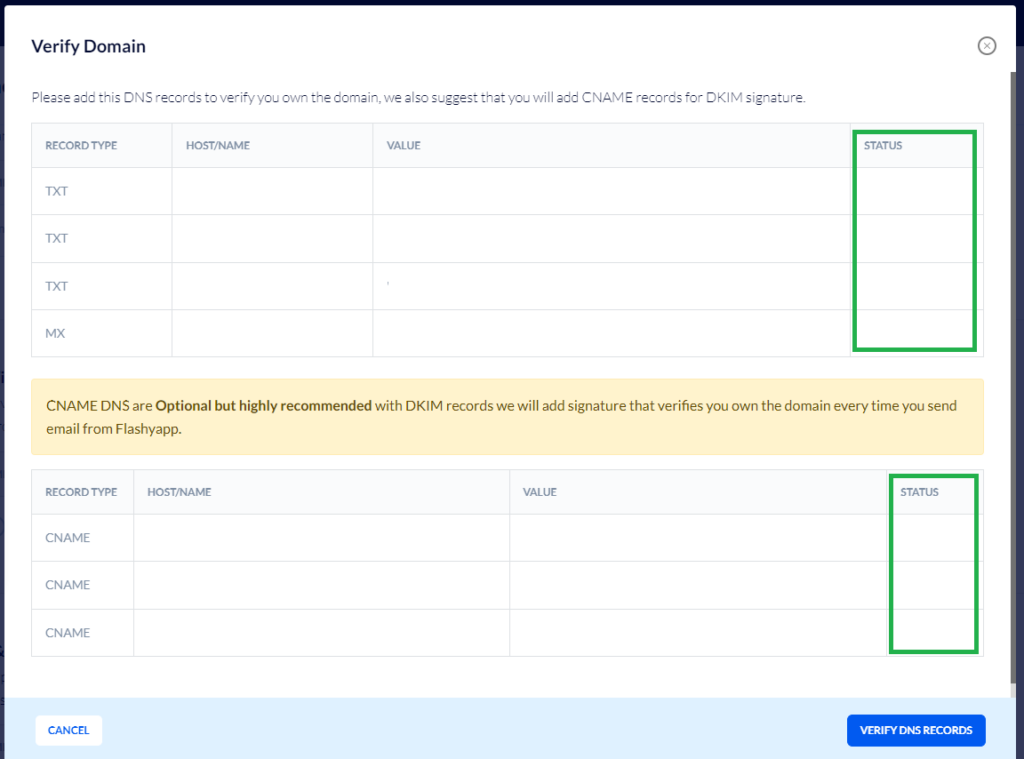
9. Click the "Verify DNS records" button at the bottom of Flashy's screen

After adding record entries, you can use this tool to check whether you have added all the required records successfully. The tool will display the current status of each record entry, indicating whether they have been added or not.
Completing the process – only when all your records have been verified successfully
After completing the verification process, all records added will appear as "verified", if you've followed all the steps correctly you will now see that the "verify" button is gone and the domain is marked as "Verified" on the main settings screen.
Creating a sending profile after completing the domain verification
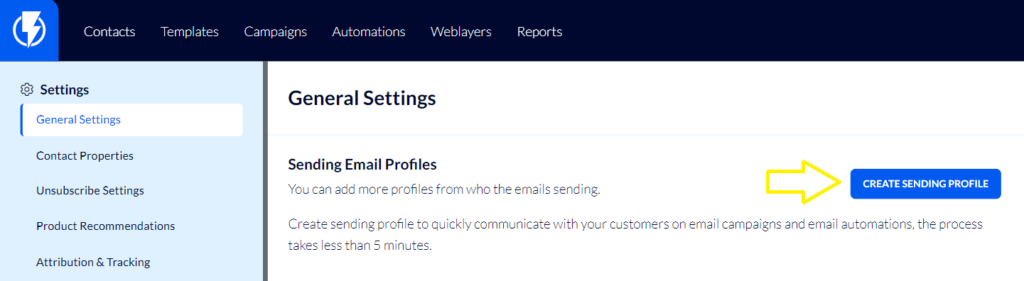
After completing the verification process, you will need to add a new sending profile.
The sending profile should use the same domain which you verified, in cases where you have multiple domains you will be required to repeat the verification process for each domain to use it as a sending profile.
To create a sending profile, go to the "general settings" screen and click on "Create a sending profile" which is the first option on the side menu.
Fill in the required details:
"From Name" - fill in the website name.
"From Email Address" - fill in the website's email address, which will be used to send emails to customers (this email address should contain the domain you have verified).
"Reply To" - fill in the website's email address, all replies to your emails will arrive at this email address.
Click on the "Create Profile" button.

The new sending profile will be authorized immediately upon completion of all details. Email verification is not necessary since you have already verified the domain.
In cases where you've already used the platform prior to this process, you will need to update the sending profile on all of your existing automations if any emails are being sent from them:
To do so, simply open the automation and look for any steps where an email template is being sent out.
Click it and update the field for "Sending Profile" and press "Save".

After completing the task, please ensure to click on the "Save Automation" button.
