
Popups #5: Triggers
This article is part of our series on Popups.
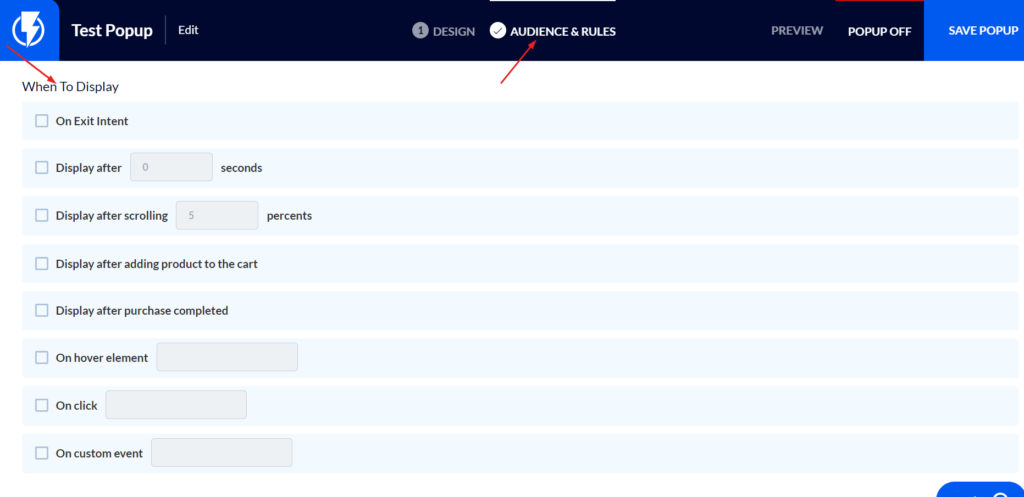
Let’s focus now on the “When to Display” section in the “Triggers & Targeting” tab of the Popup Builder.
Creating relevant and effective popups is a combination of having an overall understanding of contacts’ behavior patterns and clearly specifying when to display a popup. Here are your options for timing and method:
- Exit intent: Show the popup when a visitor is preparing to exit a web page, as detected by mouse movement.
- Display after x seconds: Specify how many seconds to wait before showing a popup. For example, if a customer has been on the checkout page for two minutes, you may choose to send them a popup to see if they need help completing their order.
- Display after scrolling x percent: Show the popup when a visitor has scrolled down a certain percentage on a specific page. For example, if a visitor is reading through your blog post, you can send a popup when they reach the halfway point (50%) on the page. The popup could ask if they want to subscribe to more of your articles to stay on top of the latest news from your business.
- Display after adding product to the cart: Can be used to cross-sell or upsell.
- Display after purchase completed: Another great opportunity for upselling.
- On hover element; On click; On custom event: With these triggers, you can specify any place on your website or any custom event you’d like to link to a popup. Enter the class or ID. to display the popup.
With some thoughtful timing, your popups will create powerfully targeted customer interactions and more sales!
The next installment in our series on popups is “Popups #6: Conditions.” Read on to learn how to combine triggers and conditions to create popups that will be highly relevant to your visitors every time.
