
Custom eCommerce Intergation
If your eCommerce site uses a platform that is not compatible with Flashy’s “One-Click-Install,” you will need to perform a custom integration. The process is easy and straightforward.
With the integration, you will be ready to create targeted segments of customers who have stopped purchasing from you and win back their loyalty. You will have the ability to create unlimited automations from each event. You will be able to convert your visitors to customers, and so much more. Your business will be ready for unprecedented growth!
*IMPORTANT NOTE: Before you proceed with the custom integration, please view these articles to check whether Flashy already supports your eCommerce platform:
- Shopify - Full Integration Overview & Install Guide
- WooCommerce - Full Integration Overview & Install Guide
If the custom integration is needed, please follow the steps below for a seamless process.
STEP 1: INSTALL EVENT PIXELS
It is important to understand that the marketing automations Flashy creates are event-based. An “event” happens when a specific activity is performed - for example, when a customer adds a product to their cart or views a specific page on your website.
Flashy detects these events through the use of pixels and starts automations based on them, according to your specifications. For example, you might choose to send emails or SMS messages to customers who view products in your store but don’t add them to their cart (browse abandonment), or to customers who add items to their cart but don’t complete their purchase (cart abandonment).
In order for Flashy to be alerted to your customers’ events and start the automations, you will need to install Flashy’s pixels. To start the pixel installation process:
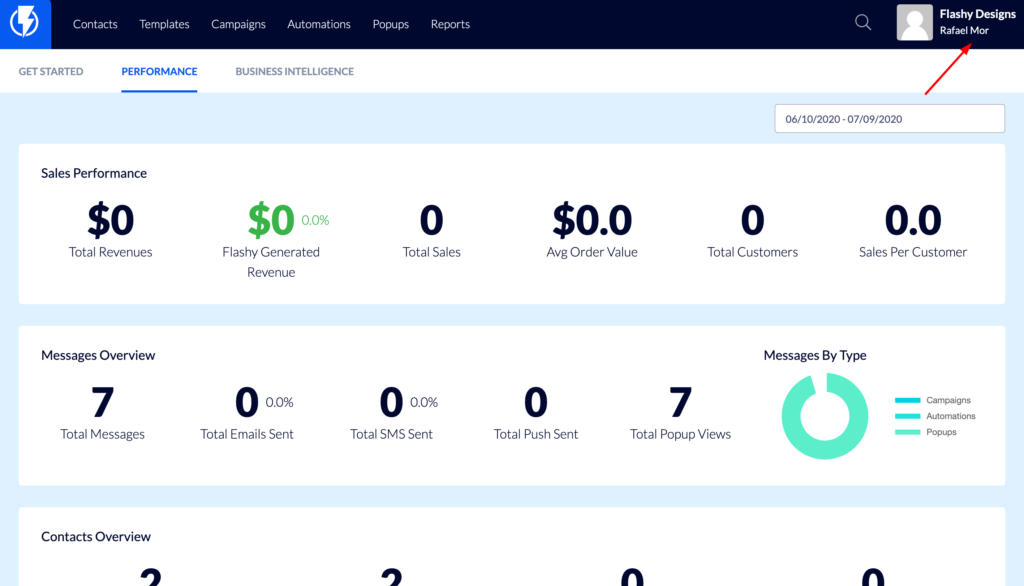
Click on your user name in the top-right corner.
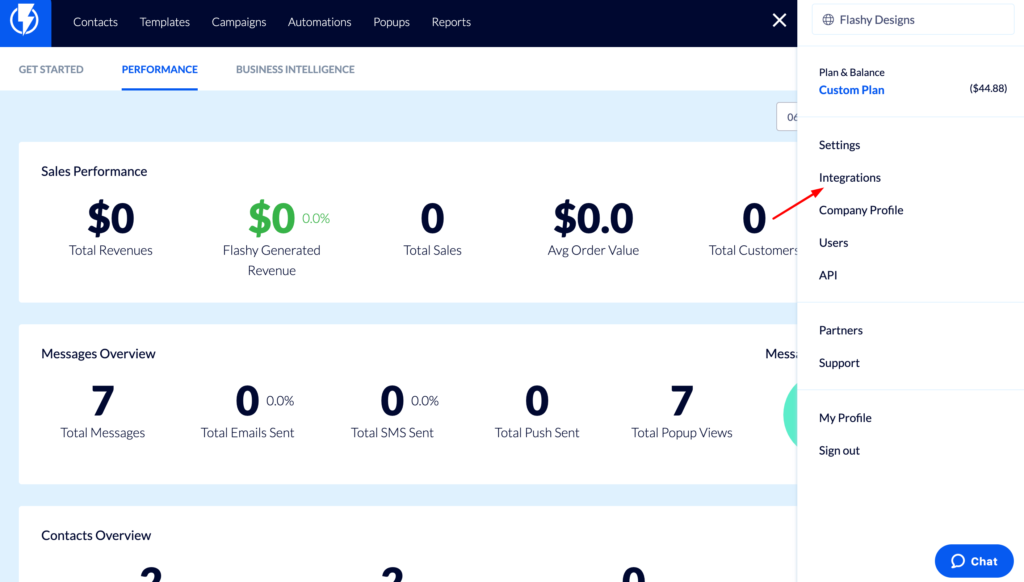
Click “Integrations” in the menu.
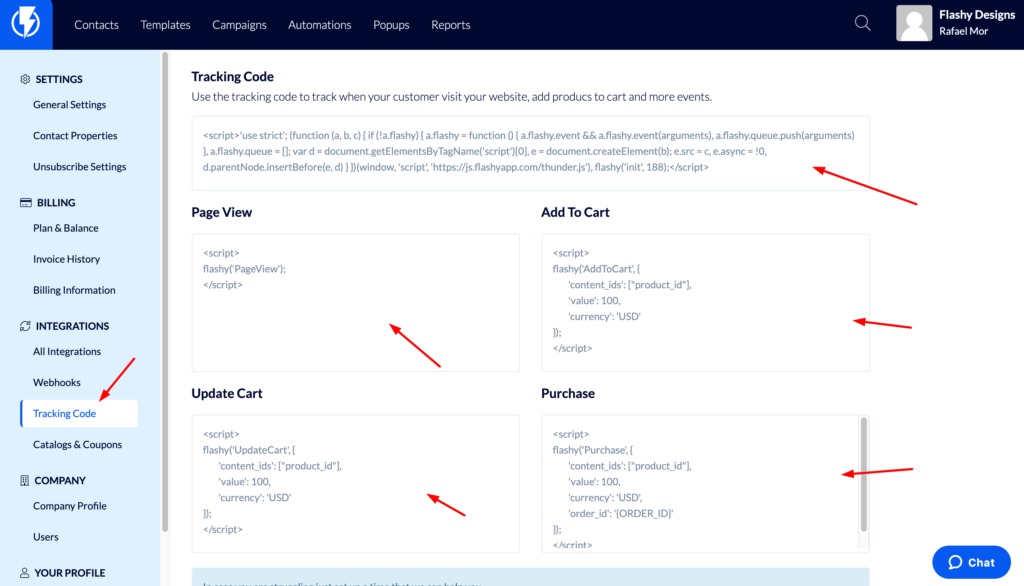
In the left-hand menu, go to “Tracking Code” under “All Integrations.”
STEP 2: IMPORT CONTACTS
If you haven’t already imported your contacts to Flashy, please do so now by following the steps in this article on Importing Contacts to a List.
STEP 3: IMPORT ORDERS
Once your contacts have been imported, you will also want to import their order history, so that you’re not starting from scratch. This will allow you to view information such as what products they have purchased and when, and the lifetime value of each customer.
To import orders, you must first prepare a CSV file containing the order information. Please read this guide for preparing a CSV file for import.
Once your CSV file is ready, follow the steps in our Importing Customer Orders article to bring all of your customers’ order information into your Flashy account.
STEP 4: IMPORT PRODUCTS
The final step in the integration process is to import your products to Flashy. It is important to include a catalog of products in your account so that Flashy can perform targeted automations related to them. For example, if a customer places some jewelry items in their cart and leaves them there, an email automation can be sent with pictures and information on those specific products as a nudge to complete the purchase.
You can create several different catalogs if needed. This is highly convenient for businesses that sell products worldwide, and therefore need to communicate in different languages, use different pricing, etc.
To create a product catalog:
Prepare a CSV file of product information according to the guidelines explained here.
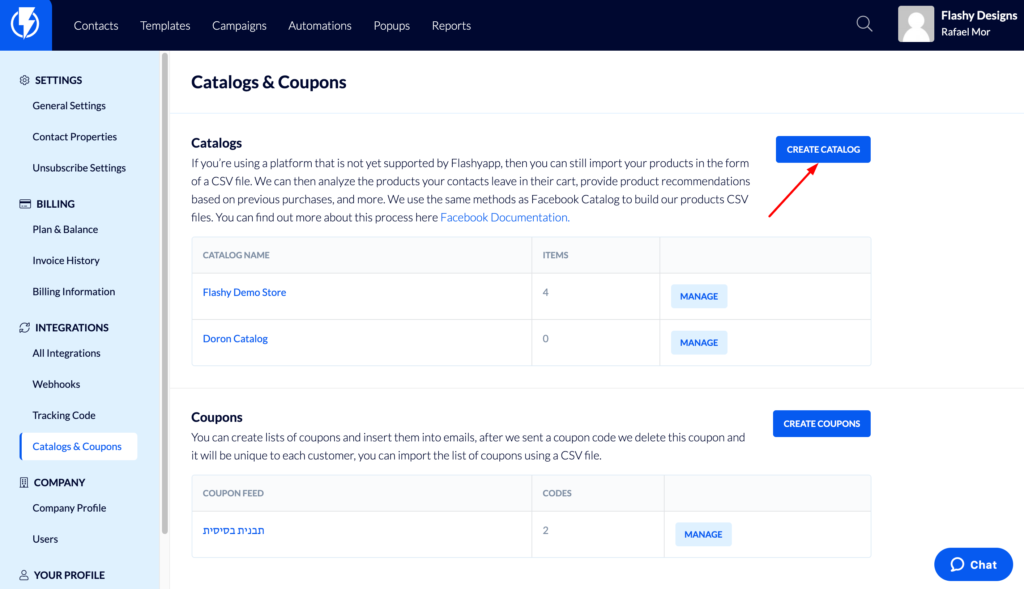
Go to “Catalogs and Coupons” in the left-side menu under Integrations.
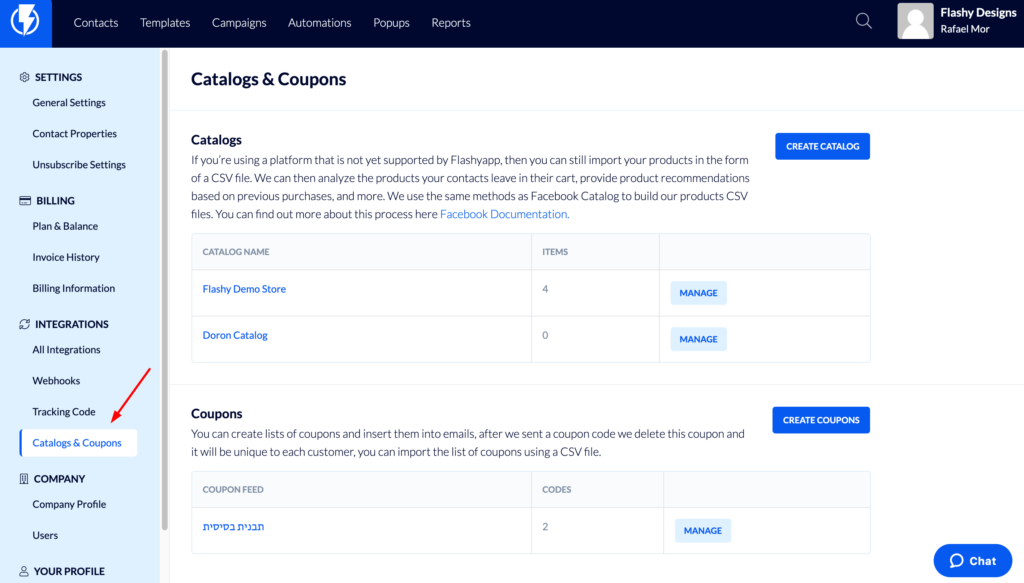
Click the blue “Create Catalog” button in the Catalogs section.
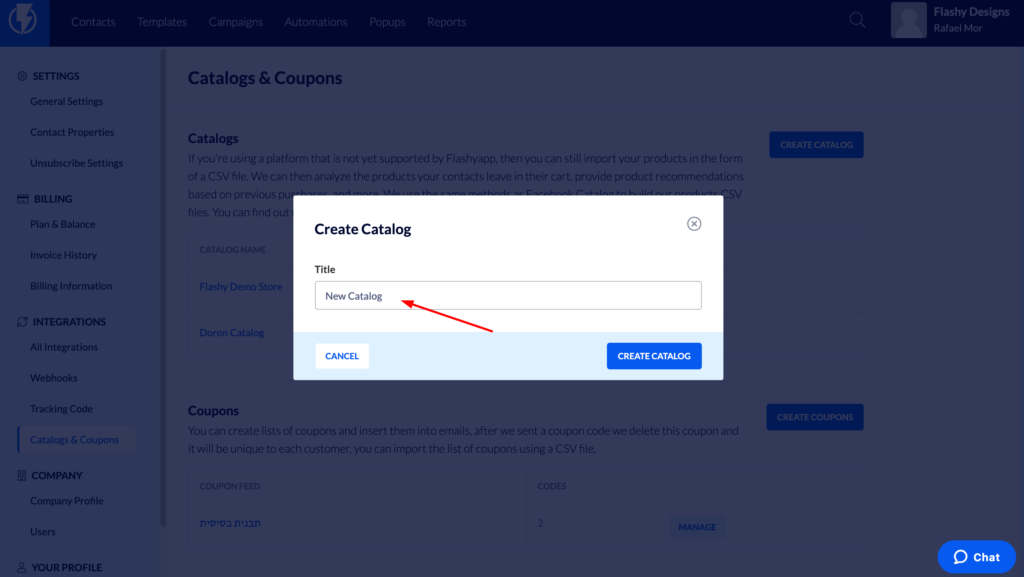
Enter a name for your catalog.
There are two different options for importing your products to the catalog:
- Basic CSV file import - Prepare the file according to File Preparation guidelines found on the Import Orders page. Your products will be imported immediately.
- Set schedule for bulk uploads - Most likely, your catalog will undergo frequent changes; new products will be added and availability of certain products will vary. To keep your catalog up-to-date, Flashy gives you the option to set up scheduled product imports. Flashy gathers catalog information from a url that you provide on the Catalogs and Coupons page (insert screenshot). Select the day of the week and the time you wish the information to upload. The uploads can come from a CSV, JSON, or XML file; select the appropriate one for your upload. If you already have a Facebook catalog (usually a CSV file) or Google catalog (usually an XML file), you can use those; they are completely compatible with Flashy. Simply enter the URL.
Once you’ve gone through these four steps - installing pixels, importing contacts, importing orders, and importing products, you will have completed your custom eCommerce integration.
