Importing Contacts to a List
A simple way to add a significant number of contacts to a list is to import them.
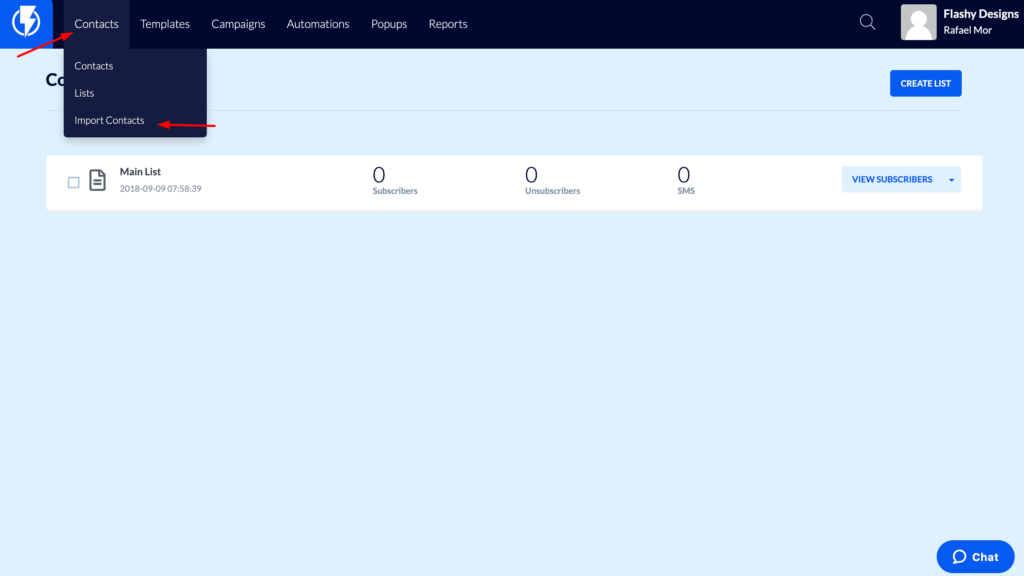
To begin the process, go to the “Contacts” tab in the top-left corner of your screen, click, and select “Import Contacts.”
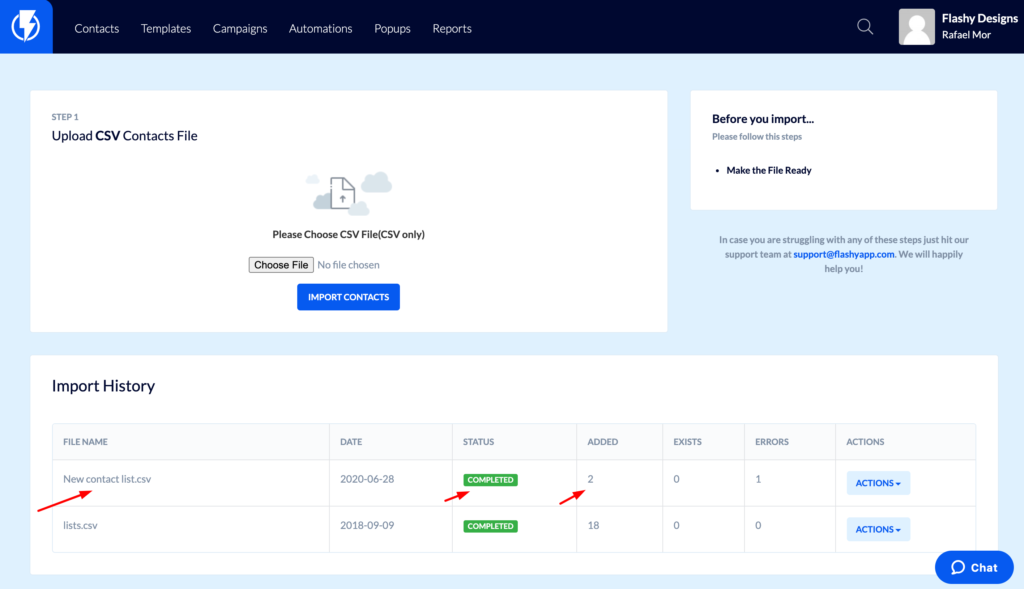
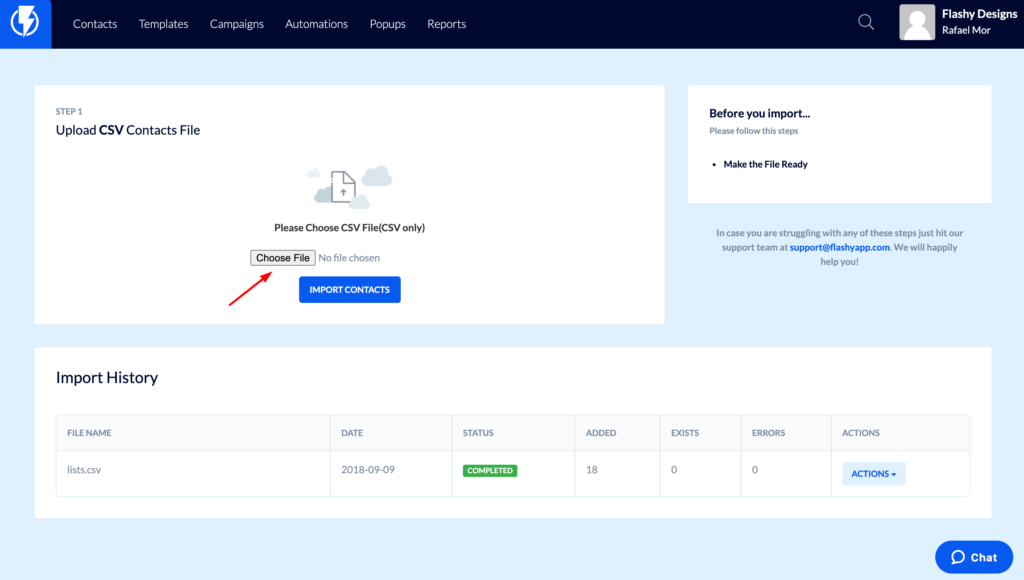
Step 1: Upload CSV Contacts File
Choose a CSV file to upload and then click “Import Contacts.”
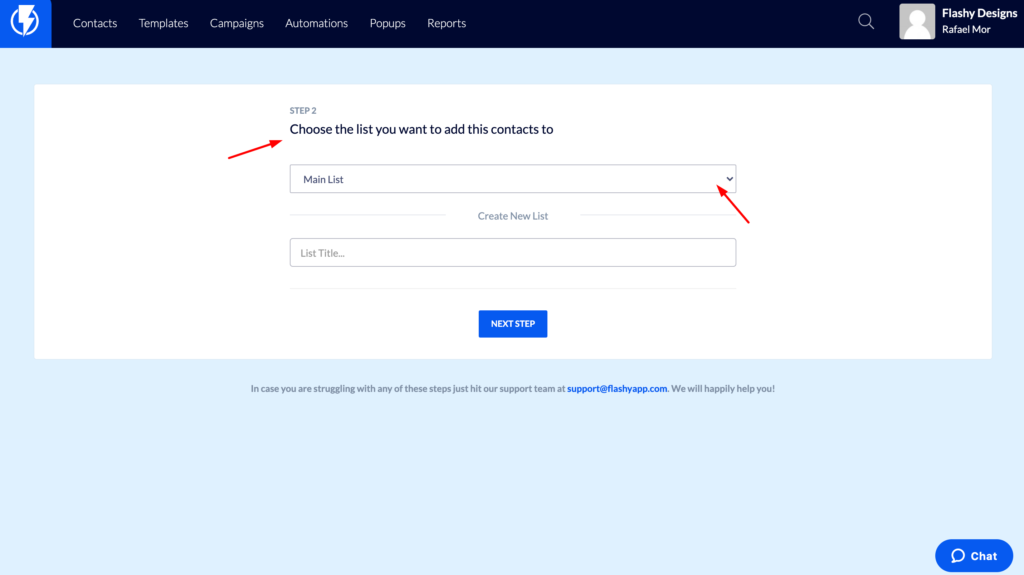
Step 2: Choose the List You Want to Add These Contacts To
Choose to import to a list you’ve already created or create a new list.
Step 3: Choose the Status of the Subscriptions on the List
Here you have three options. It’s important to understand how each one will affect your import before making your selection.
- Subscribe all contacts - All the contacts you are importing have allowed you to send them marketing material, so they will be subscribed to communications. If there are pre-existing contacts on your list who are unsubscribed, choosing this option will change their status to subscribed.
- Unsubscribe all contacts - The imported contacts are not allowing you to send them email marketing, and therefore will not be subscribed. If there are pre-existing subscribed contacts on the list, their status will be changed to unsubscribed.
- Only subscribe new contacts - Contacts who do not exist in the list or in Flashy in general will be imported and subscribed. This does not affect contacts already existing in the list in any way.
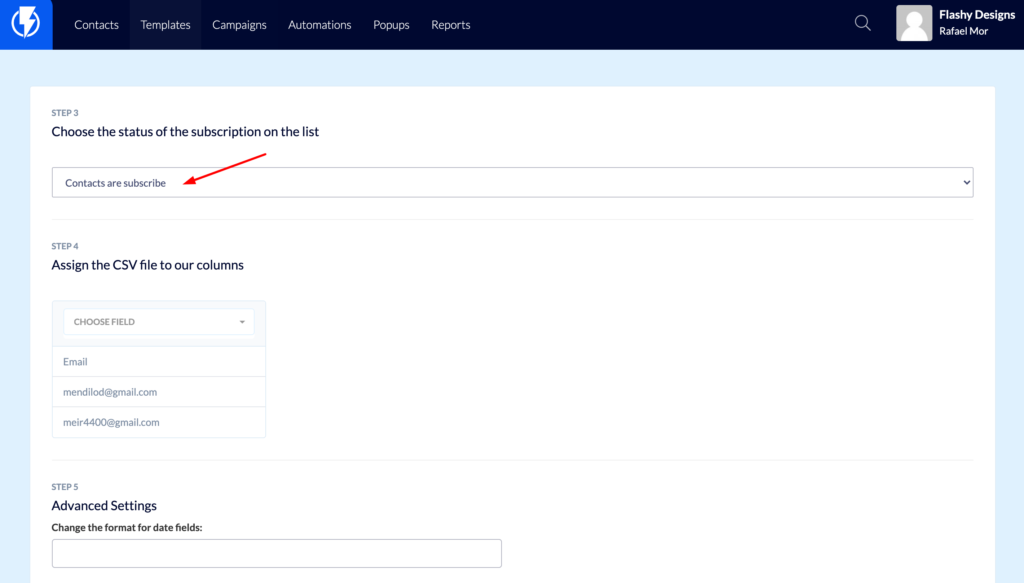
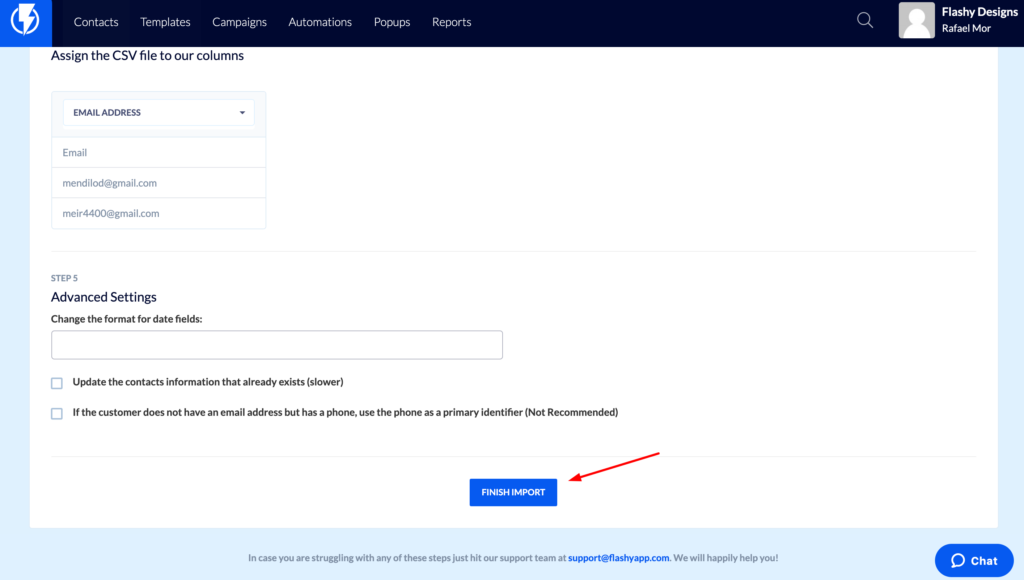
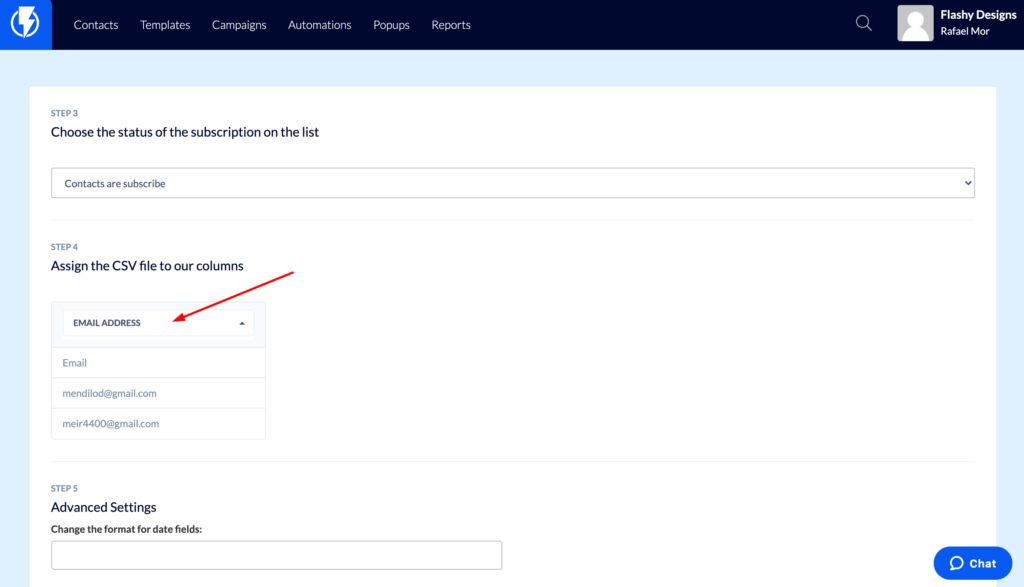
Step 4: Assign the CSV File to Our Columns
Once you’ve chosen the status of the subscription, the next step is to match up your CSV file columns with Flashy’s column format. Use the dropdown menu options to set up each column.
Step 5: Advanced Settings
- Change the format for date fields - Format according to your location’s practice
- Update the contact’s information that already exists - This will update/replace existing information with the new imported information. Important note: This action will override existing information in Flashy if it is in the columns that the new information is transferred to.
- If the contact doesn’t have email but does have a phone number, use the phone as the primary identifier (not recommended). This action will import contacts this way, and also change existing contacts on the list to being identified by their phone number instead of email address.
Click the “Finish Import” button. It may take a few minutes or more to finish, depending on the size of the import. When it is complete, you will see the Import History (results) at the bottom of the screen.