Implementing the Complementary AI Pixel in Shopify
To ensure proper statistics counting for your reports, you must implement our AI pixel for your Shopify store.
Installation Steps
This is the way to implement it:
- Log into your Shopify store through the Admin account.
- Go to Settings.
- Select Customer events.
- Choose Add custom pixel.
- It's recommended to name it Flashy AI.
- Leave the Permissions settings as they are.
- In the code box, delete the default code and paste the following code:
analytics.subscribe('checkout_completed', (event) => {

  (function (a, b, c) { if (!a.flashy) { a.flashy = function () { a.flashy.event && a.flashy.event(arguments), a.flashy.queue.push(arguments) }, a.flashy.queue = []; var d = document.getElementsByTagName('script')[0], e = document.createElement(b); e.src = c, e.async = !0, d.parentNode.insertBefore(e, d) } })(window, 'script', 'https://js.flashyapp.com/thunder.js'), flashy('init', __ACCOUNT_ID__);


  window.addEventListener('onFlashy', function() {

    let purchaseEvenet = {
    'content_ids': event.data.checkout.lineItems.map( item => item.variant.id ?? item.variant.product.id ),
    'value': event.data.checkout.totalPrice.amount,
    'currency': event.data.checkout.currencyCode,
    'order_id': event.data.checkout.order.id
    };

    console.log("Flashy Checkout Event", purchaseEvenet);

    flashy('amplify:Purchase', purchaseEvenet);
  });

});- Crucially, within the code, ensure you change the __ACCOUNT_ID after the
initfunction to the client's actual ID:
('init', \_\_ACCOUNT\_ID\_\_)
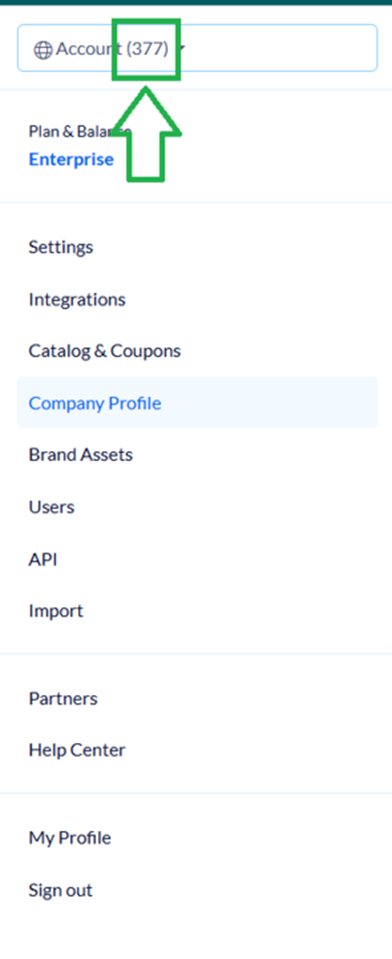
*Where to Find the Account ID?
The ACCOUNT ID is located within the client's tab in Flashy, right next to your account name.
So, for example, it should be:
('init', 377)