
Sending SMS Campaigns
Flashy’s SMS campaigns are a dynamite combination of power and convenience. Before we dive into the “how” of sending SMS campaigns, let’s take a look at the unique benefits Flashy offers:
- The SMS credits you purchase with Flashy can be used to send messages worldwide. No more hassle and expense of buying different credits for individual countries!
- Flashy’s SMS credits never expire, so you can use them when you need to, without worry.
- When you send an SMS, Flashy automatically takes all the links in your message and shortens them to a convenient length, so you’re not paying for any extra characters. There is no need to use Bitly or any other link shortening service.
- Each contact who receives the SMS gets different, individualized links. This means that Flashy can keep track of exactly who is doing what. If a contact clicks on their individualized link in an SMS, we can then track their activities on the website. So, if a contact adds something to their cart and then abandons it, we can start an automation aimed directly at them. Even after a contact leaves the website or closes their browser, and only revisits the site after a week or two has gone by, Flashy can still identify and keep tracking them. This is the power of individualized links!
When you are ready to send an SMS, please follow the steps below:
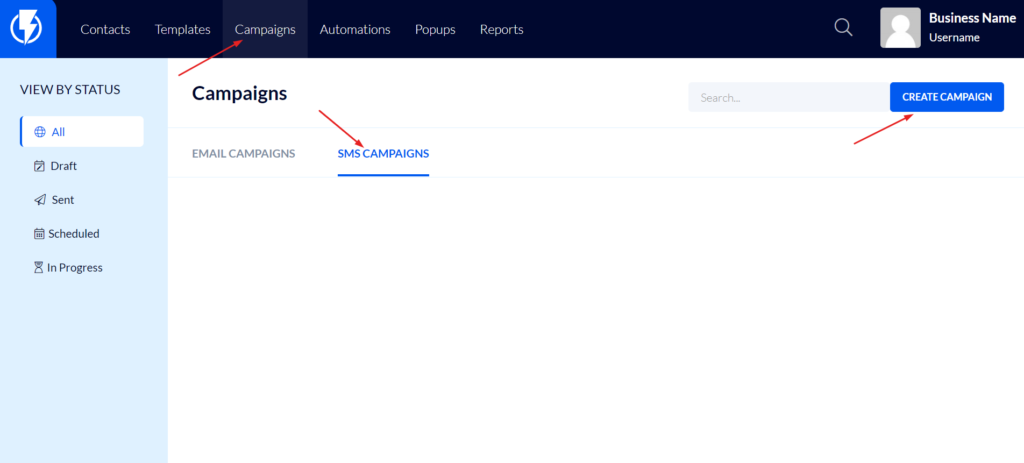
- Go to Campaigns in your Flashy dashboard at the top of the screen.
- Go to the SMS Campaigns section.
- Click on the blue “Create Campaign” button in the top right corner of the screen.
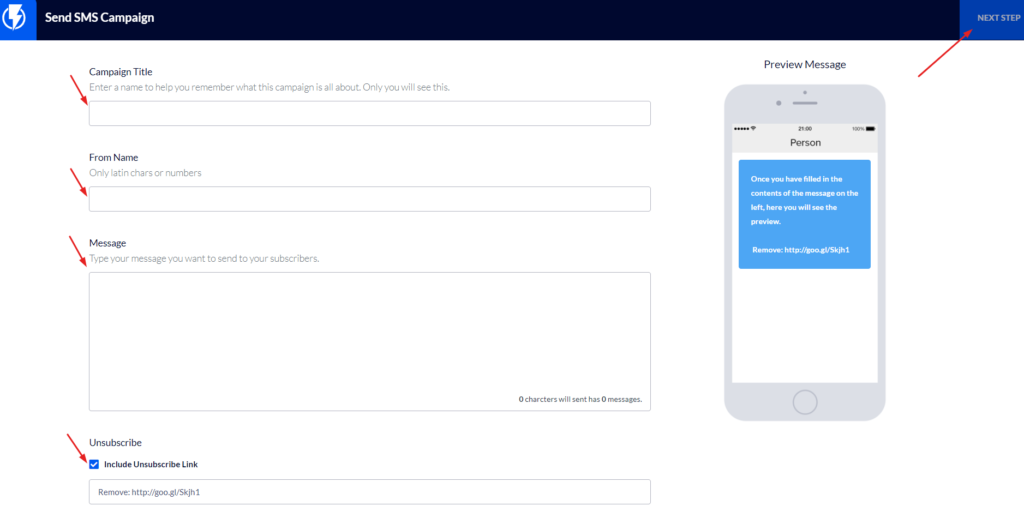
Campaign Message
- Campaign Title - Enter the title that you want your contacts to see.
- From Name - Provide the name that you want your campaign to be sent from. Please use only English letters with no spaces, or a phone number.
- Message - Enter your message. Remember that links included in the message are automatically shortened for you!
- Unsubscribe Link - Indicate whether or not to include an unsubscribe link. This is a must in most cases, and we recommend always including one. You don’t need to change anything here; simply use the link provided.
- A preview of your SMS is included on the right side of your screen.
- When you’re ready, click the blue “Next Step” button in the top right corner of the screen.
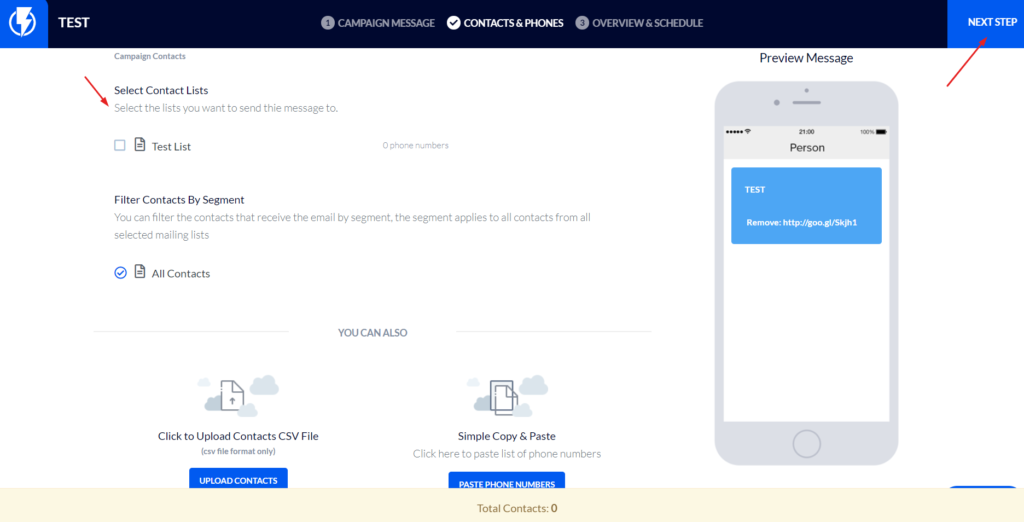
Contacts & Phones
- Select Contact Lists - Choose the lists you want to send to.
- Filter Contacts By Segment - Here you can choose to send to all of the contacts on your selected lists or a segment that you created previously.
- The total number of contacts the SMS will be sent to is at the bottom of the screen.
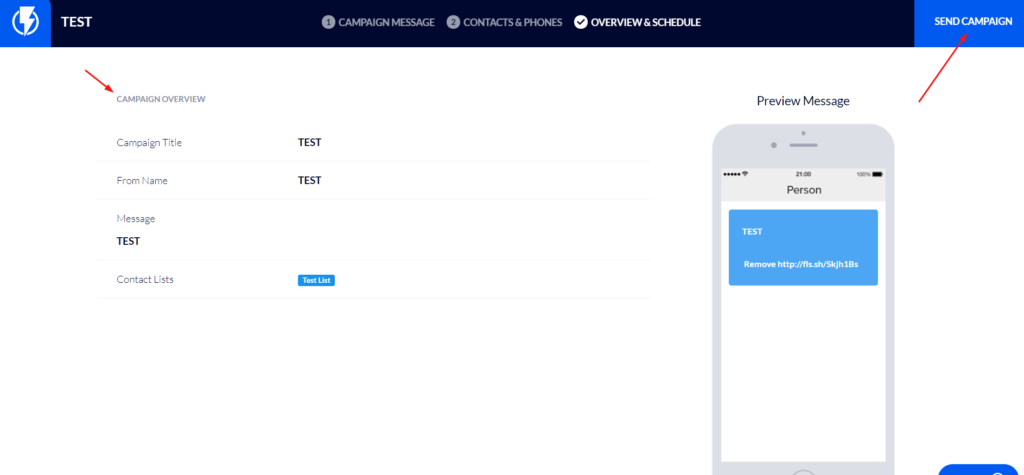
Overview & Schedule
- On this screen, you can review the details of your campaign before sending.
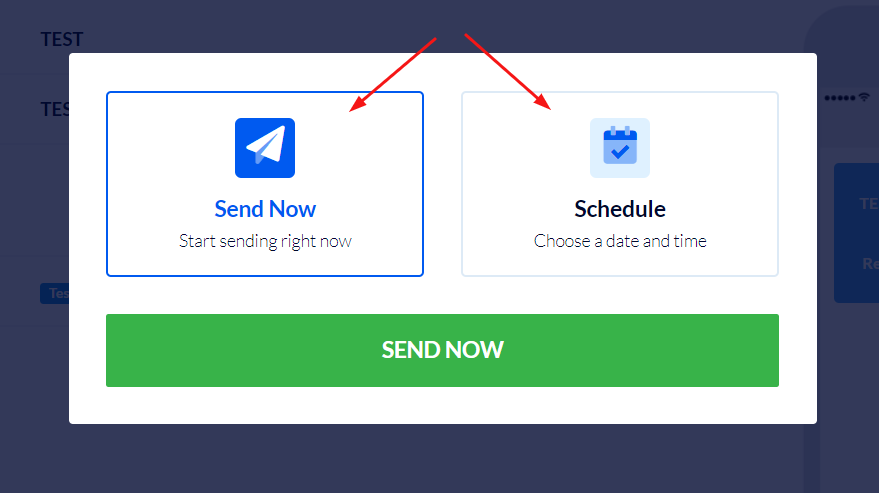
- Schedule when the SMS will be sent - You can choose to send it now or at a later time.
And just like that, you’ve created a highly sophisticated SMS campaign! Now, all it takes is one click from a contact, and the journey to a long-standing customer relationship begins...
