
Sending Email Campaigns
Sending email campaigns through Flashy is one of the most effective ways to communicate with your customers. Before you can send that eye-catching email, there are a few things you need to do first to ensure proper set-up. Please see the article links below for more details on how to complete each step:
- Create a sending profile - This is the account from which your email campaign will be sent. If you have multiple sending profiles, you’ll need to decide which one you want to send from.
- Import your contacts to Flashy.
- Create a list containing all of the contacts you want to send the email campaign to.
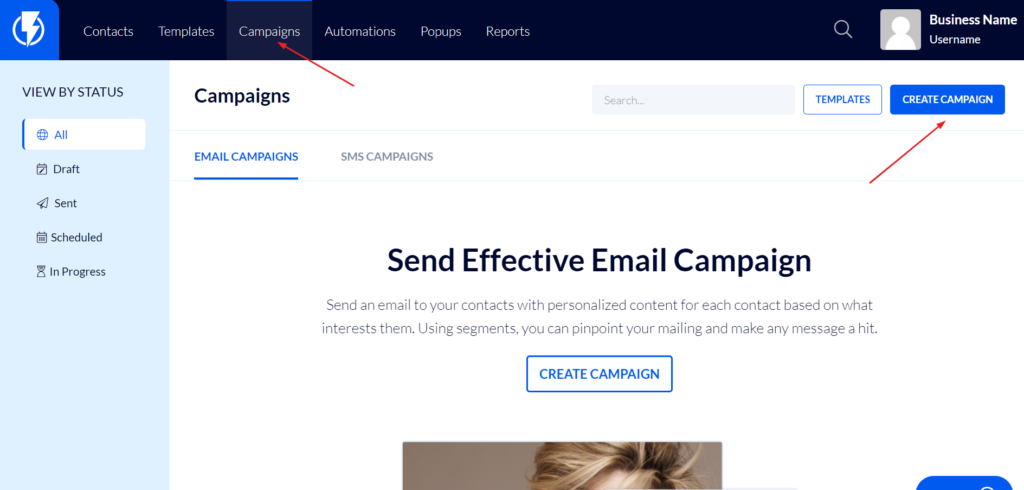
Create an Email Campaign
Once you’ve finished with these three steps, you’re ready to create an email campaign! To get started, go to “Campaigns” in your Flashy dashboard at the top of your screen. Click on the blue “Create Campaign” button in the top-right corner and follow the process below:
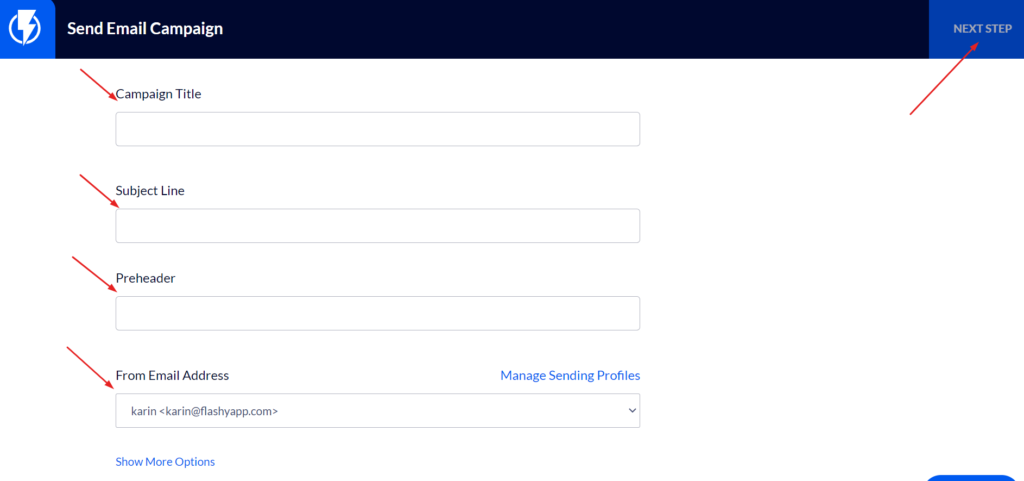
Info
- Campaign Title - Enter a title for your own internal use; email recipients will not see it.
- Subject Line - Enter the subject you want recipients to see.
- Preheader - Enter a preheader if desired. When a recipient is viewing their inbox, before opening individual emails, the preheader is the text that follows the email subject line.
- From Email Address - Choose the sending profile you wish to use to send the email. Here you can also view and edit the From Name and Reply To Email Address. There is also a link for managing your sending profiles if needed.
- Google Analytics - Here you can type in the name of the campaign - for example, “SummerSale” - or any other identifier, and it will show up on your Google Analytics report. Including the campaign name makes it easier to identify the traffic generated by this campaign on the report. If you choose not to fill it in, Flashy will do so for you.
- Click on the blue “Next Step” button in the upper right-hand corner.
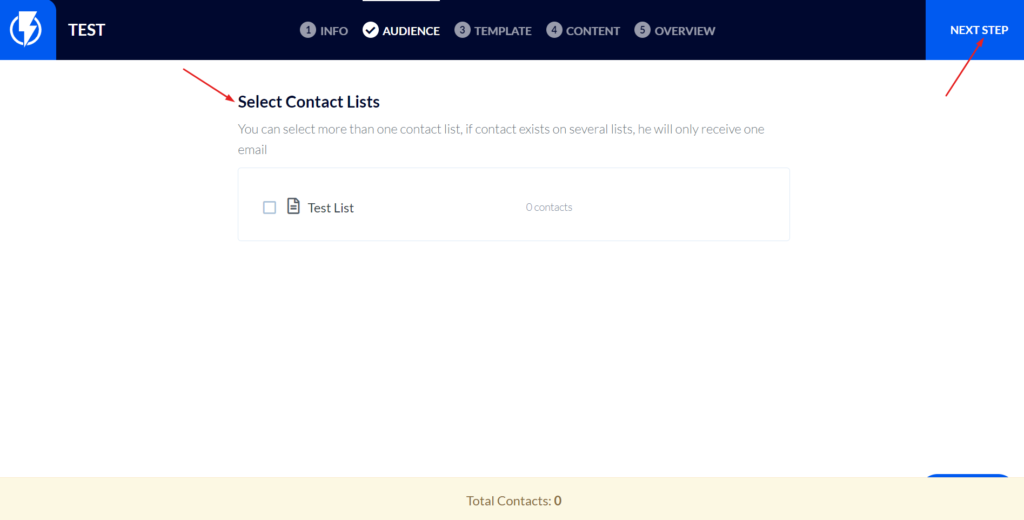
Audience
- Select Contact Lists - Choose the lists you want to send the email campaign to. If you choose more than one list and there are some overlapping contacts between them, don’t worry - the contacts will only receive one email. The total number of contacts who will receive the email campaign is listed at the bottom of the screen. If the number is less than the total number of recipients on your lists, it is due to overlap between the lists.
- Filter Contacts By Segment - Here you can filter all the lists you’ve selected using a previously created segment.
If you need to create a segment at this point, go to “Contacts” at the top of your screen and choose “Segments” from the dropdown menu. In the left-hand menu, create a new segment by clicking on the blue plus sign. For example, you might choose to make a segment on customers who made a purchase in the last 30 days. The segment will be applied to all the lists you’ve selected.
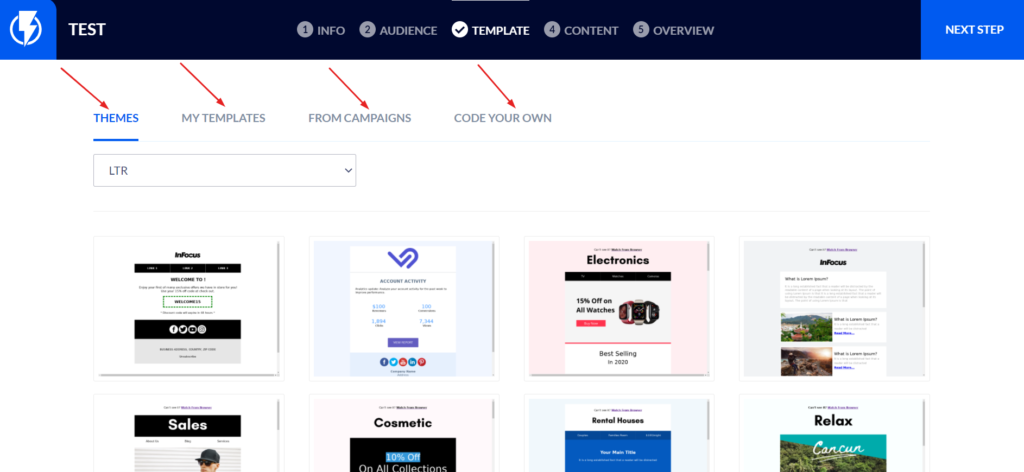
Template
- Choose the template you want to use for the email campaign and edit it as desired.
Flashy Pro Tip: If you are sending promotional content, be sure to provide an unsubscribe link at the bottom of the email.
- Your template menu includes:
- Themes: These are the templates Flashy provides.
- My Templates: The templates you have created previously in your Flashy account are stored here. You can choose to work off of one of these templates when creating a new email campaign.
Flashy Pro Tip: If you send a weekly newsletter to your contacts, or any other recurring communication, we recommend creating a template for it that you modify for each new edition. That way, you don’t have to recreate the email every time.
- From Campaigns: These are the campaigns you’ve sent previously. Like your templates, you can always choose to modify one of these for use in a new campaign.
- Code Your Own: In this section, you can create your own template from scratch, if desired. Paste in the HTML code in the field provided.
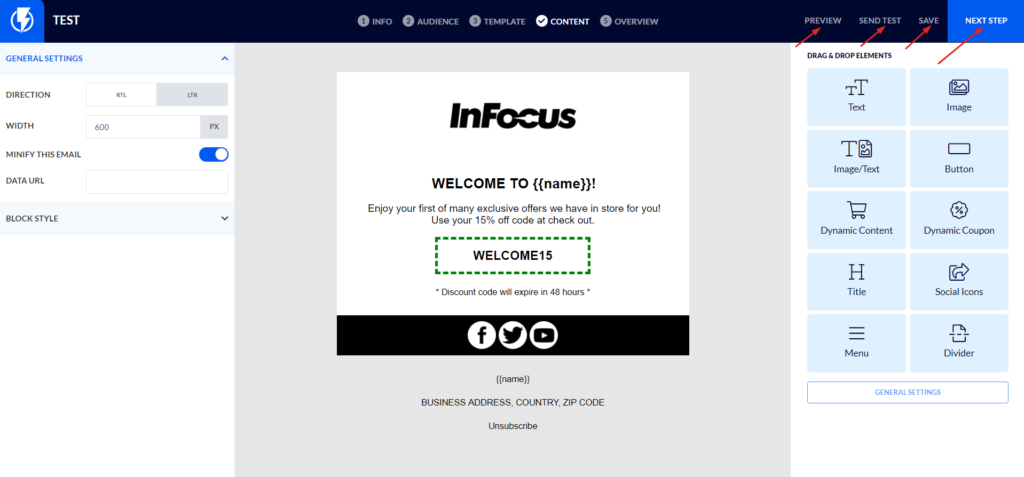
Content
- In this section, add content and edit your template until it’s just right.
- When you’re ready to preview your template, click on “Preview” in the upper-right corner. Choose the mobile, desktop, or browser preview from the dropdown menu to see how your template will look on different devices.
- It is highly recommended to send a test of your email campaign before sending it to your contacts. Click on “Send Test” in the upper-right corner, and enter the email address you want to send it to. You can send a test again at any time.
- When you’re happy with your template, click “Save” in the upper-right corner, and then the blue “Next Step” button.
Overview
It’s time to review your email and make sure it’s ready to send. This screen displays an overview of your campaign. Review the Subject Line, From Name, Tracking Options, Unsubscribe Link, and Contact Lists.
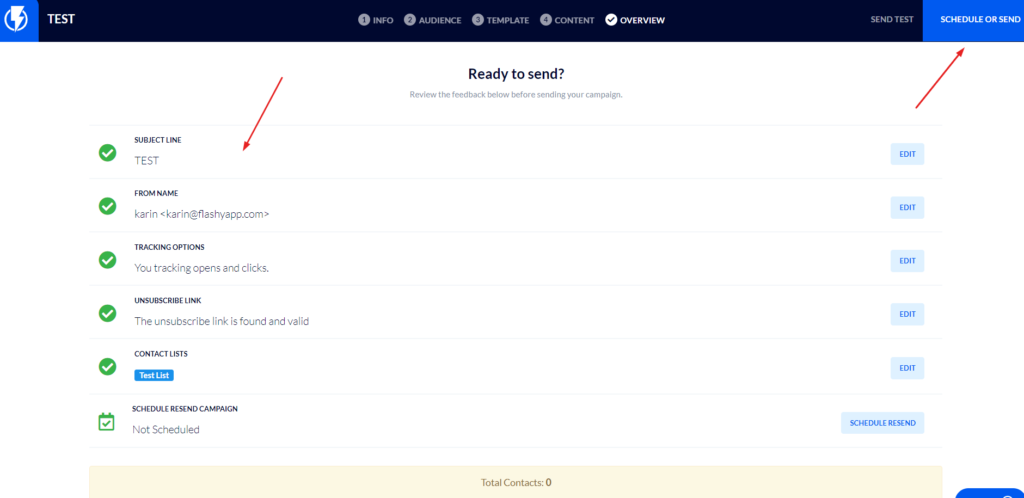
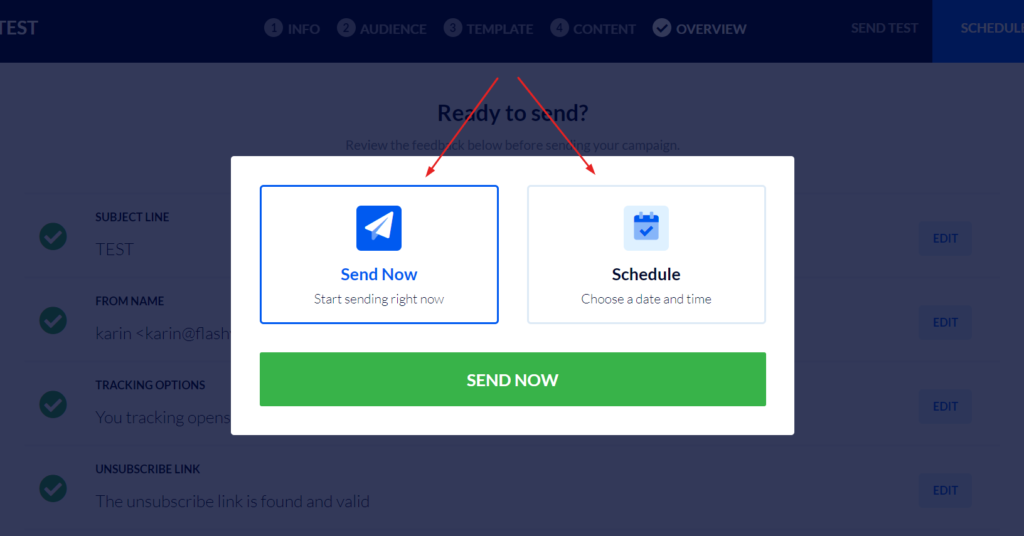
The final step in the email campaign process is to click on “Schedule or Send” in the upper-right corner. Here you have two options:
- Send Now: This sends the campaign immediately to all the contacts you chose.
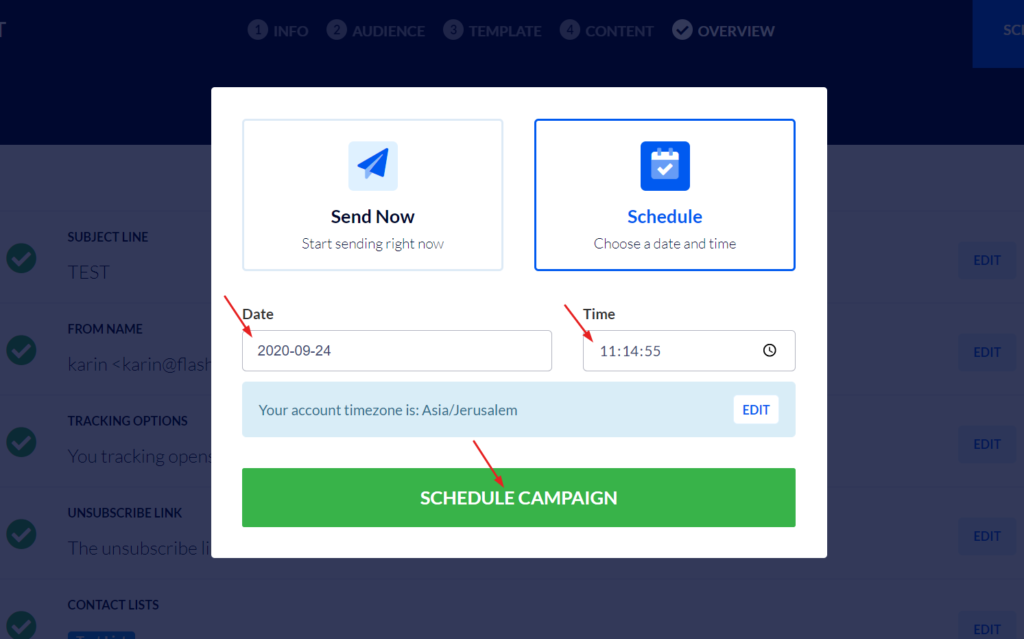
- Schedule: Select a specific date and time to send the campaign. If you used the “Resend the campaign” tool in the Overview section, and set the resend to happen in five days, for example, it will resend five days from the date you choose now in the Schedule tool.
And there you have it! You’ve just created your first email campaign. Get ready for more opens, clicks, and sales!
