
How To Create an Automation that Sends a Customer an SMS Message After They Make a Purchase – WooCommerce Platform
When a customer makes a purchase in your eCommerce store, you may want to send them a certain message, such as "Thank you for your purchase" etc. Flashy allows you to send such messages via different channels: email / SMS / push notification and more.
In this guide, we shall demonstrate sending an SMS to a customer after they make a purchase.
Creating an Automation that Sends an SMS Message Following a Purchase
Click "Automations" on Flashy's top toolbar.
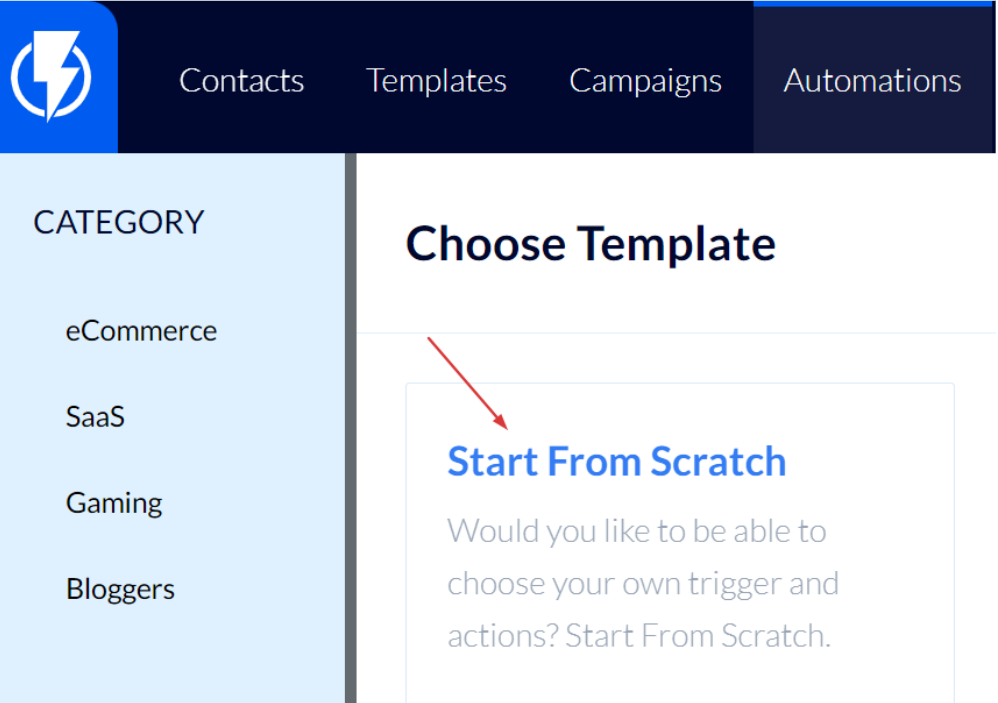
Click "Create Automation".

Select the "Start From Scratch" template.
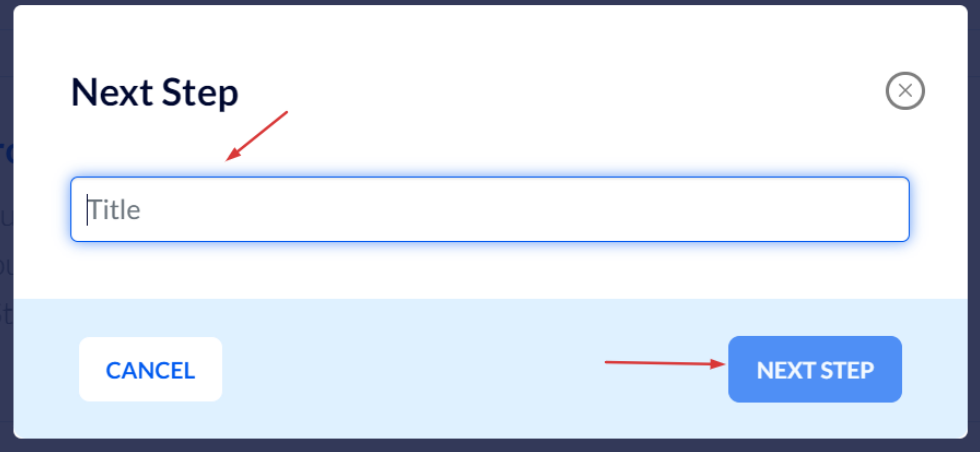
Fill in a title for the automation and click "Next Step".
Check the settings of the WooCommerce plugin regarding when to report a purchase to Flashy:
"Thank you page" or "Order is placed" – and follow the steps in this guide accordingly.
If the Plugin Setting is to Report on the Thank You Page
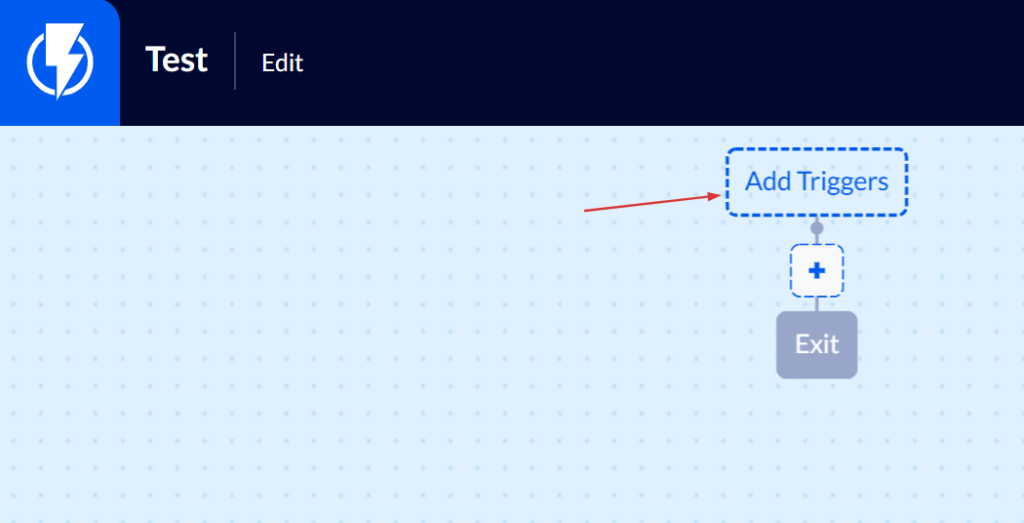
Click "Add Triggers".
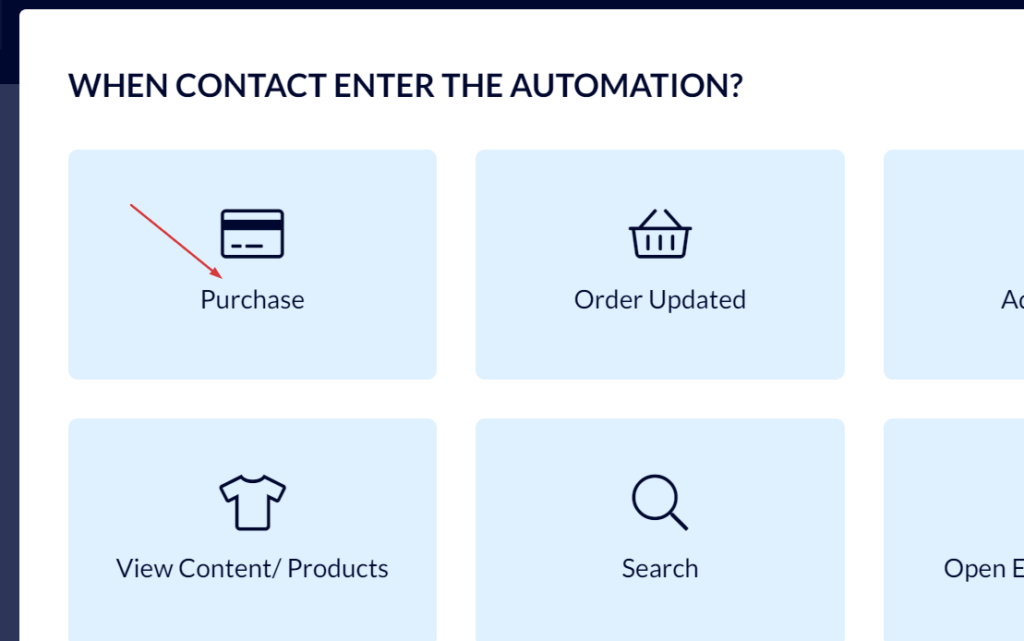
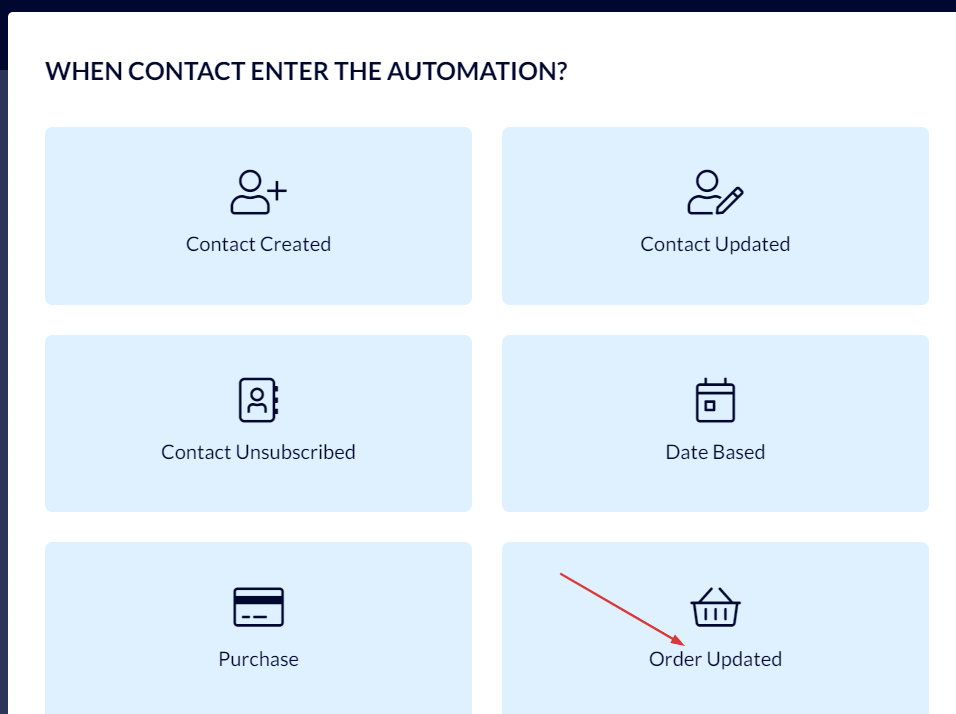
Select the "Purchase" trigger.
In the menu that opens fill in the following details:
Order Status – select all.
Set The Number Of Times A Contact Can Enter This Trigger (Lifetime) – only once or Multiple (every time they make a purchase).
Finally, click "Add Trigger".
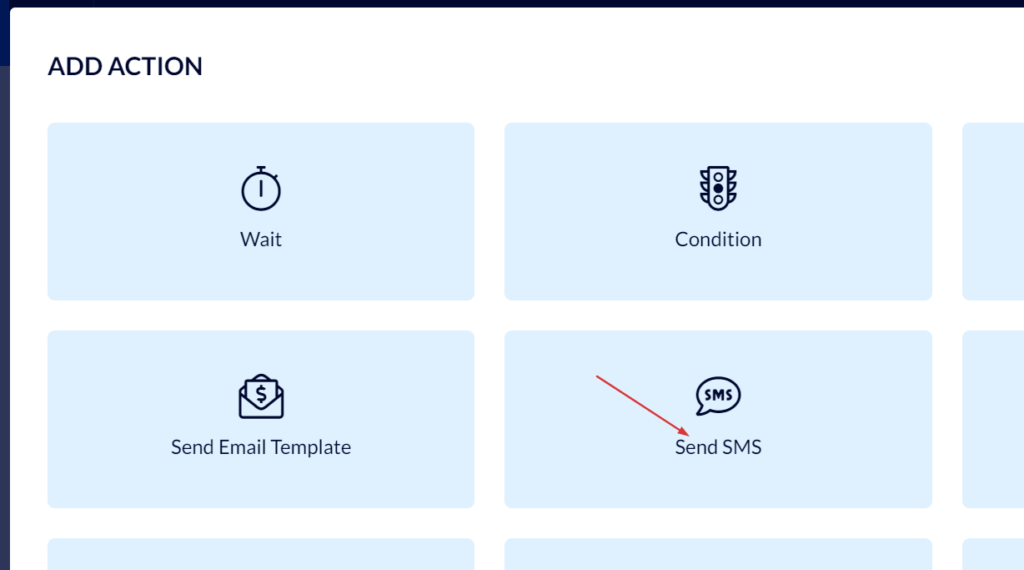
Now, add the action of sending a message after a customer has made a purchase.
Click the blue "+" button (the add action button).

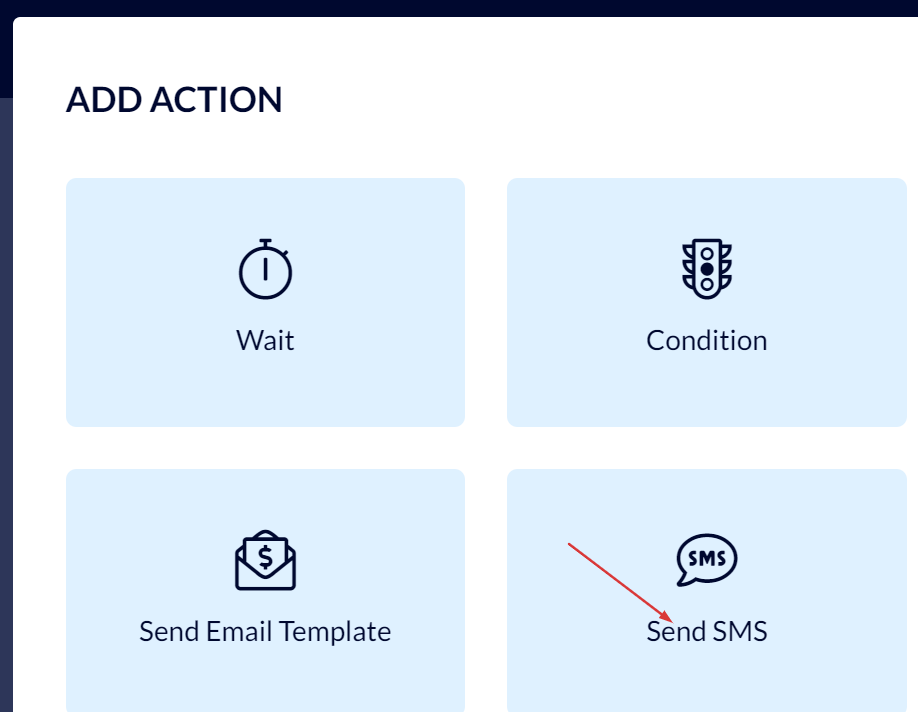
Select the action "Send SMS":
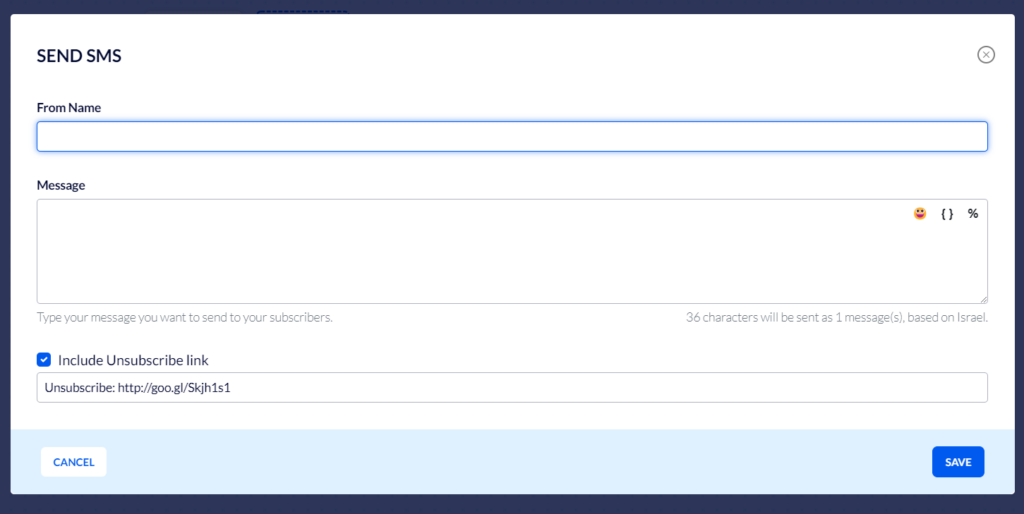
Fill in the following details:
From Name – the name of the SMS message's sender.
You must use English letter characters only – up to 11 characters with no spaces or symbols.
Message – fill in the text you wish to send.
Finally, click "Save".
You may activate the automation by clicking the activation button on the top right-hand side of the screen.
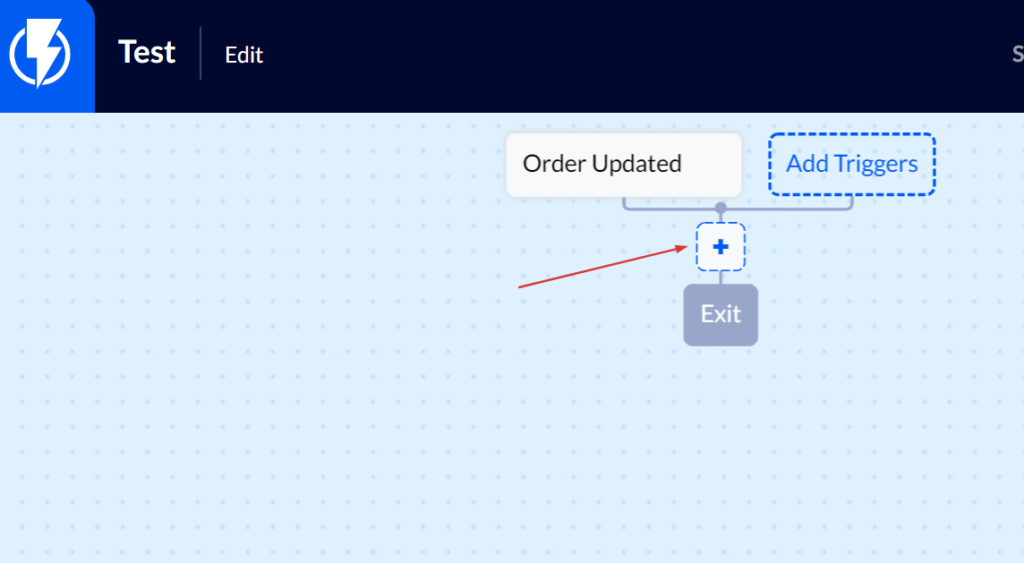
If the Plugin Setting is to Report the Purchase when an Order is Made
Click "Add Triggers".

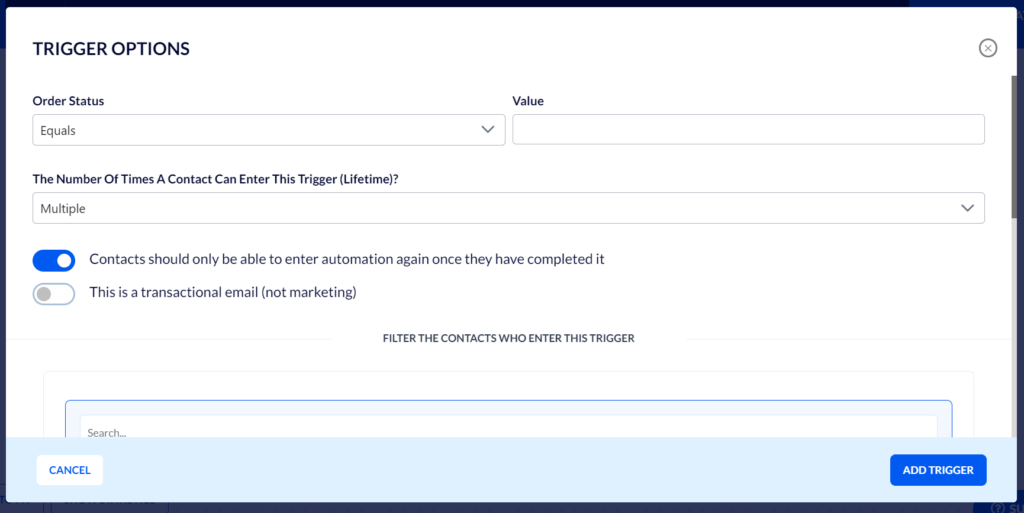
Select the "Order Updated" trigger.
In the menu that opens fill in the following details:
Order Status – "contains".
Value – fill in the status value indicating that the order has been completed. Use only English lowercase letters when filling in the status.
The right status for WooCommerce is usually: processing
- To read more about the different statuses click: https://woocommerce.com/document/managing-orders/
Set The Number Of Times A Contact Can Enter This Trigger (Lifetime) – only once or Multiple (every time they make a purchase).
Finally, click "Add Trigger".

Now, add the action of sending a message after a customer has made a purchase.
Click the blue "+" button (the add action button).
Select the action "Send SMS":
Fill in the following details:
From Name – the name of the SMS message's sender.
You must use English letter characters only – up to 11 characters with no spaces or symbols.
Message – fill in the text you wish to send.
Finally, click "Save".
You may activate the automation by clicking the activation button on the top right-hand side of the screen.
