Creating Transactional Automation
Flashy offers simple and flexible methods for creating transactional automations. These automations allow you to update customers with non-promotional information, such as regular updates on the status of their last order and expected shipment dates.
You can utilize Flashy to send messages to your customers through multiple communication channels, including email, SMS, push notifications within the application, and more.
Please note – there are different regulations and guidelines for sending informational messages compared to promotional messages. If you are uncertain whether the message you intend to send is classified as promotional or informational, it is advisable to seek advice from a lawyer. They can review your messages and regulations to provide guidance.
Creating a Transactional (Operational) Automation
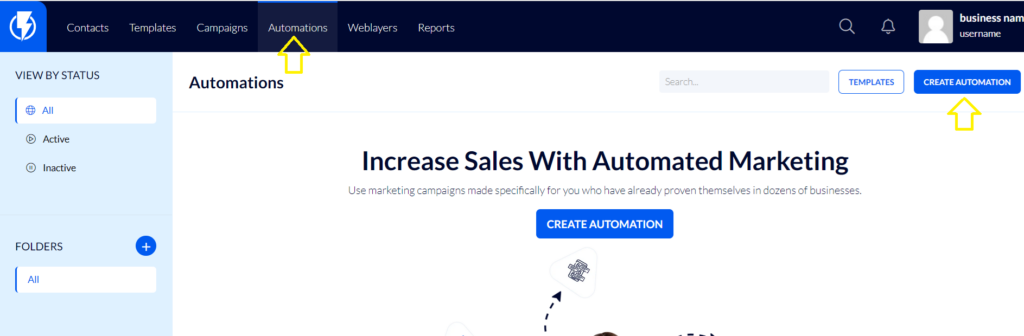
To create your transactional automation, begin by clicking on "Automations" in the upper toolbar of Flashy.
Then click "Create automation".
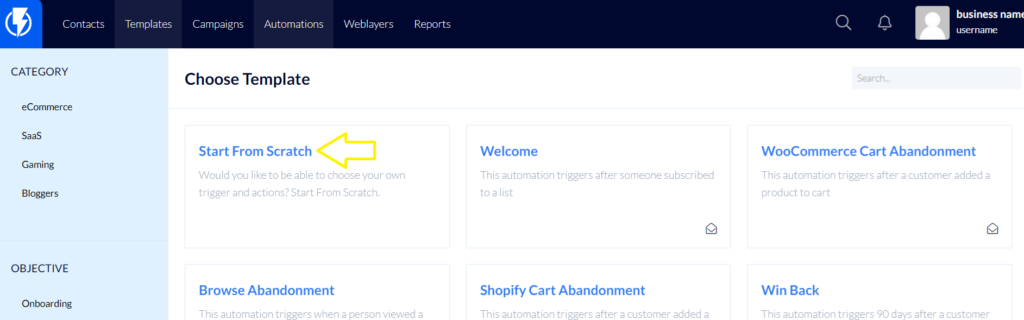
Choose the "Start from scratch" template.
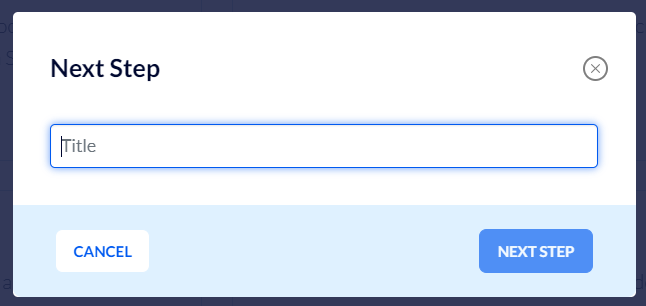
Enter a name for the automation and click on "Next step".
Click on "Add triggers".
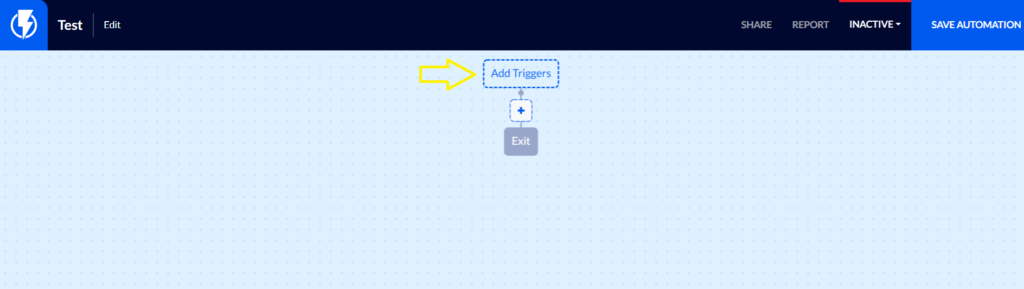
Select the appropriate trigger according to your planned scenario.
In each trigger you will find a check box noting that "This is a transactional email (not marketing)" - this check box can only be checked if the automation does not include any promotional content. Moreover, you should ensure that the message’s content strictly pertains to operational purposes.
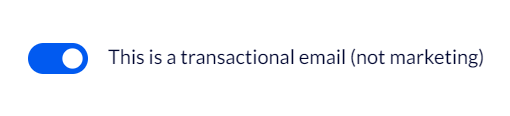
Please note: Activating this option will allow the creation of a mailing list that may include recipients who have not given their legally required consent to receive promotional email content. Therefore, it is your responsibility to confirm with a lawyer that your message DOES NOT contain any promotional content, before sending it.
To complete the process, click on the "Add trigger" button.
If the message includes an order status - you may want to use examples of the different order statuses on various platforms in these links:
WooCommerce - https://docs.woocommerce.com/document/managing-orders
Shopify - https://help.shopify.com/en/manual/orders/order-status
Magento - https://docs.magento.com/user-guide/sales/order-status.html
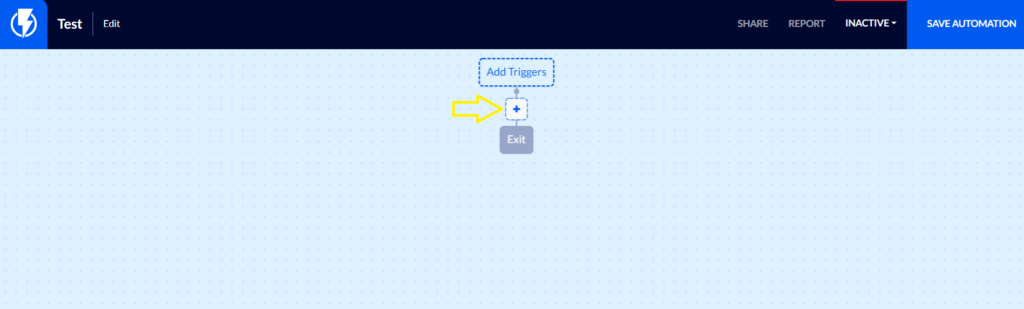
Now you can also add the desired actions by clicking on the blue "+" button (adding an action button).
If your message contains details from an order (such as the order number / delivery address, etc.) you may want to use the following guides to add relevant parameters to the message:
How to use additional context with Magento platform
How to use additional context with Shopify platform
How to use additional context with WooCommerce platform
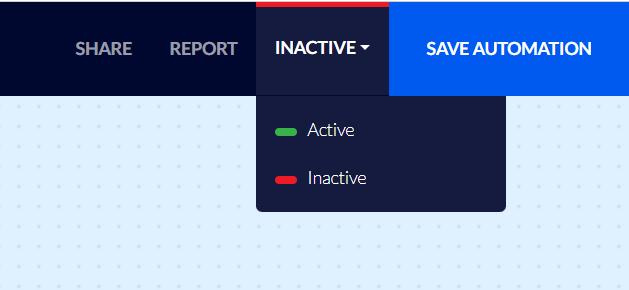
You can now activate the automation by clicking the activation button in the top corner of your screen.