Creating an Automation According to Products Purchased (on the customer’s last purchase)
Flashy enables you to create an automation intended for customers who purchased a certain product on their last purchase.
For instance, you may set up an automation for:
- Customers who purchased a specific product
- Customers who purchase a product belonging to a certain category of products
You can easily do this by following the steps described in this guide.
How To Create an Automation for Customers who Purchased a Certain Product / a Product from a Certain Category, on their Last Purchase
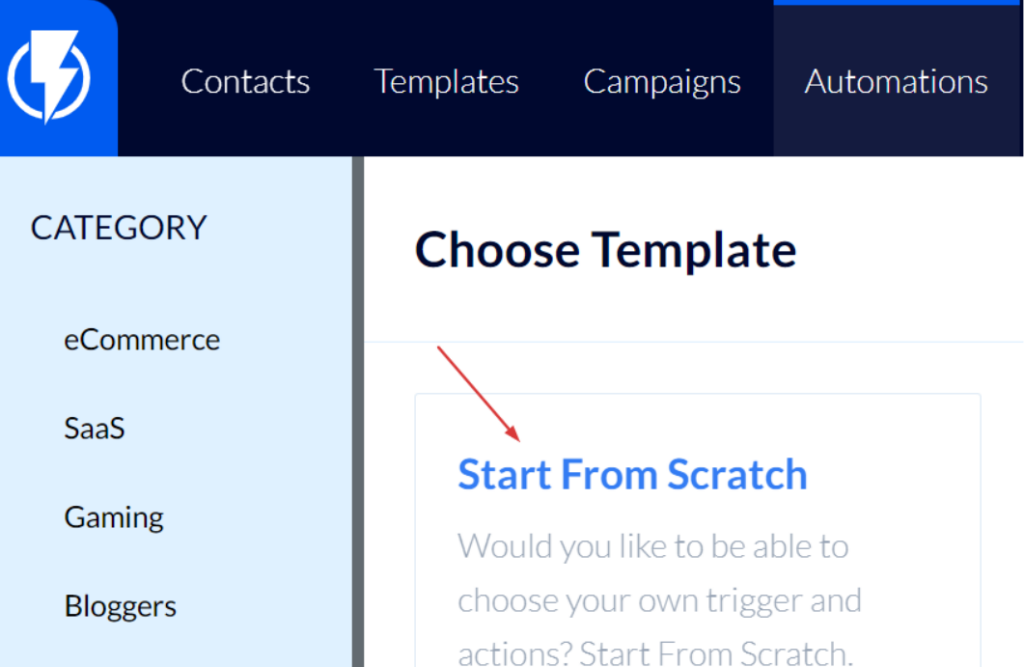
Click "Automations" on Flashy's top toolbar.
Click "Create Automation".

Select the "Start From Scratch" template.
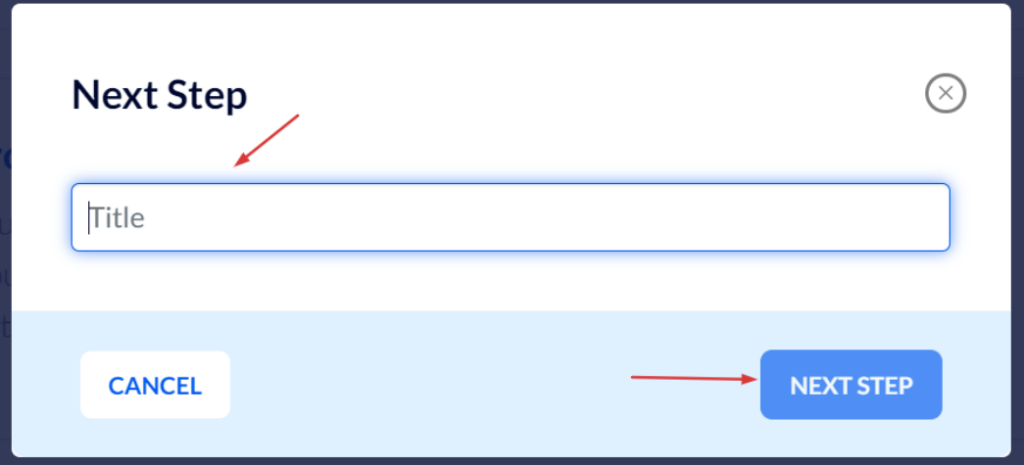
Fill in a title for the automation and click "Next Step".
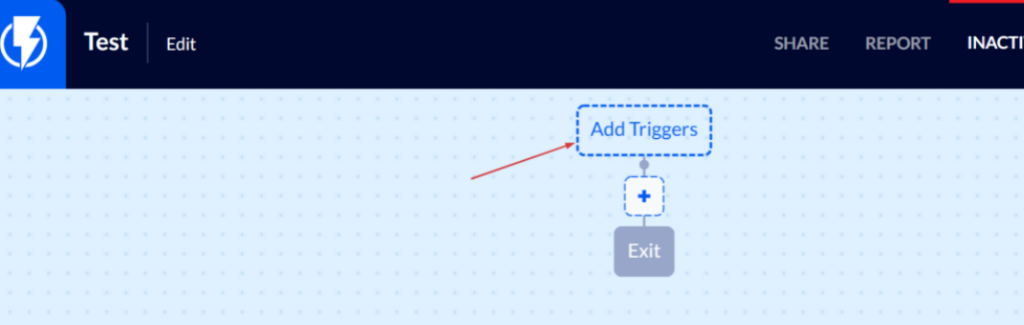
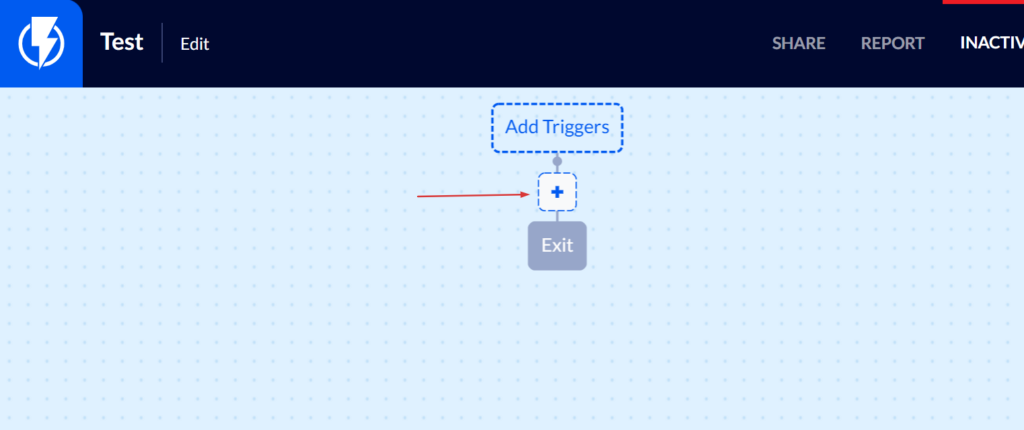
You can now create the automation journey.
Click "Add Triggers".
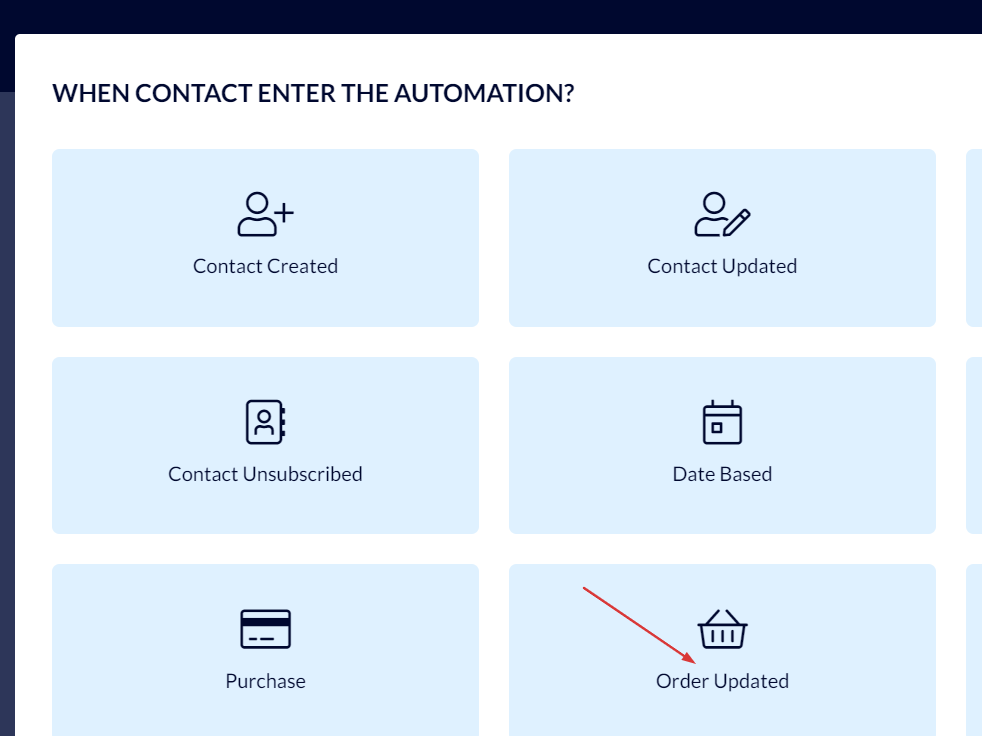
If your eCommerce Website is on Woocommerce or Magento Platforms
With Woocommerce and Magento orders are reported using a certain status and so the trigger "Order Updated" should be used.
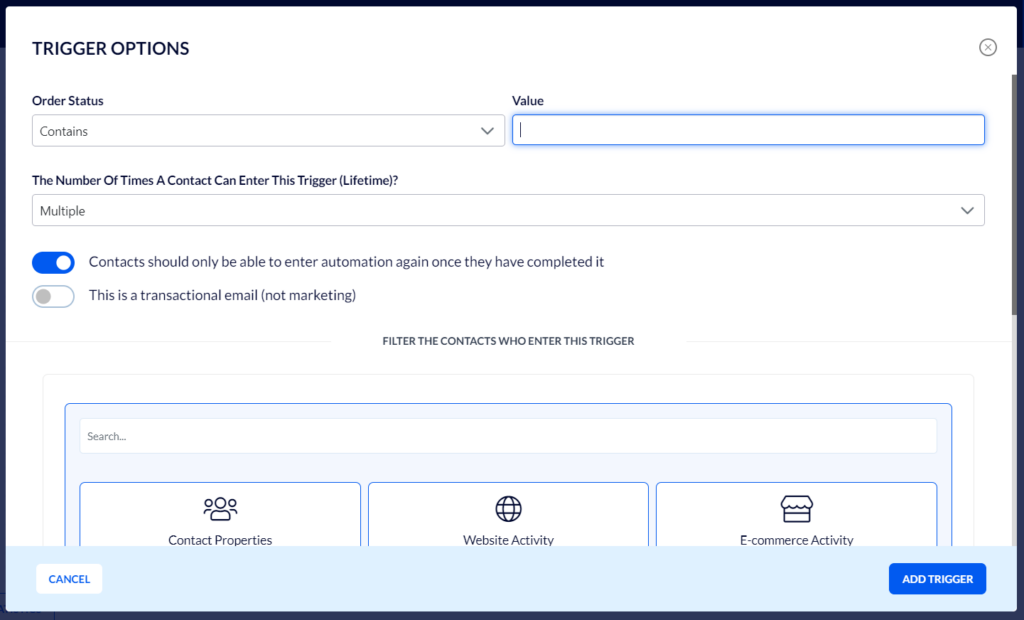
In the order's status fill in "Contains", then fill in the status indicating that the order has been paid for.
Usually, the status is "Completed" or "Processing" (you may click here to read a detailed explanation).
Please note – you must use only lowercase English letters to fill in the status.
Now, set The Number Of Times A Contact Can Enter This Trigger (Lifetime).
- If you select "Multiple" – make sure the toggle switch "Contacts should only be able to enter automation again once they have completed it" is activated.
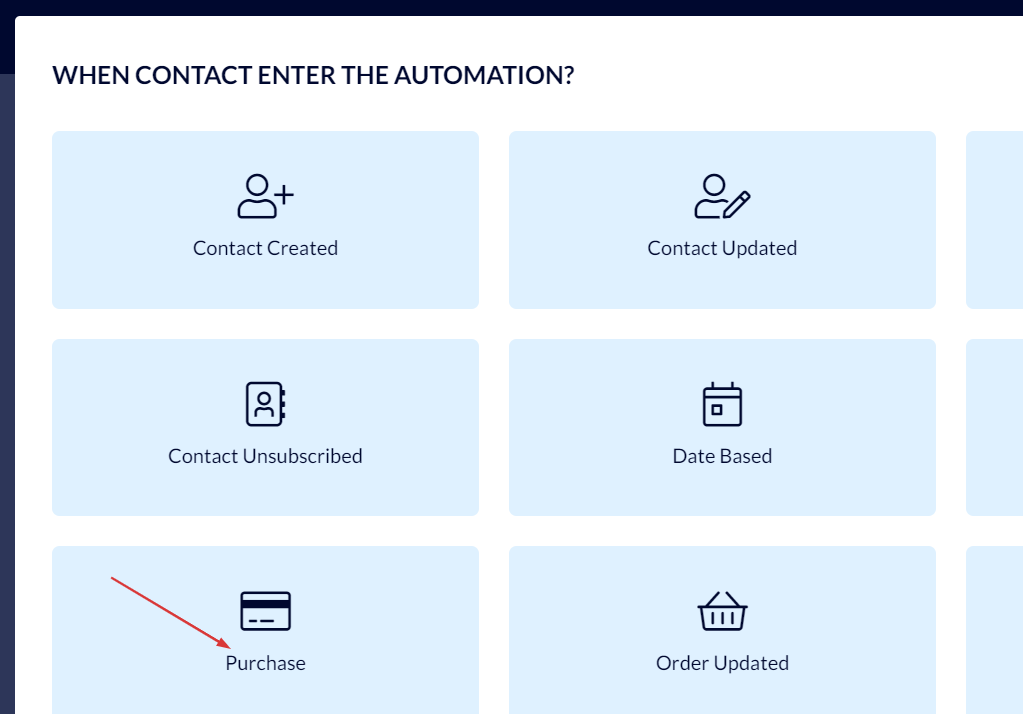
If your eCommerce Website is Neither on Woocommerce nor Magento Platforms
Select the "Purchase" trigger.
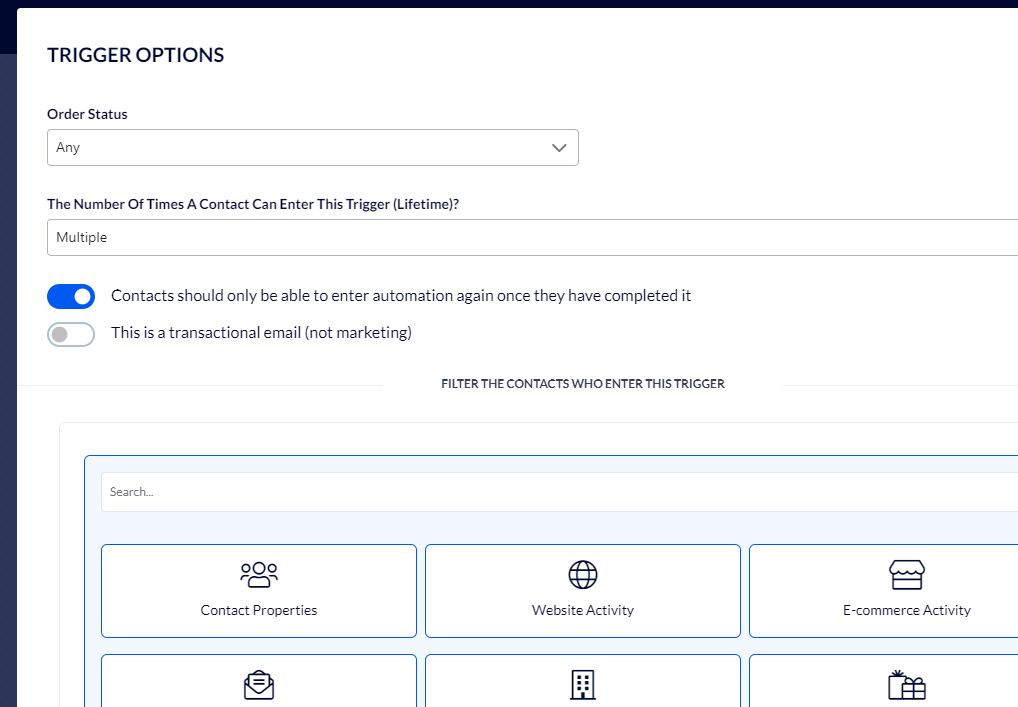
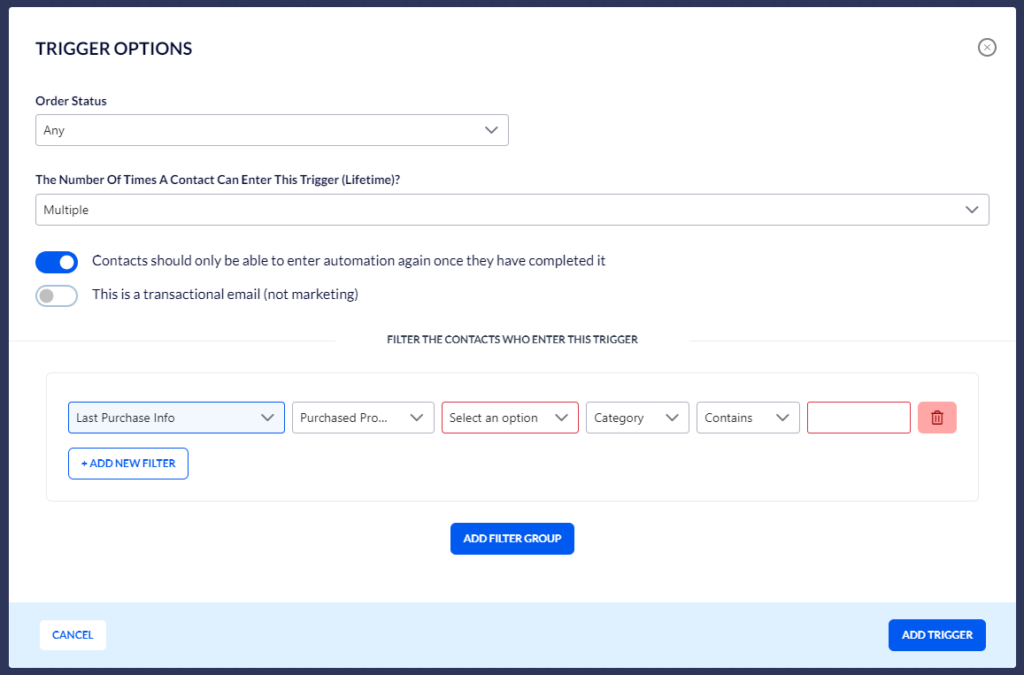
Fill in the details in the menu that opens:
Under "Order Status" – select "All".
Now, set The Number Of Times A Contact Can Enter This Trigger (Lifetime).
- If you select "Multiple" – make sure the toggle switch "Contacts should only be able to enter automation again once they have completed it" is activated.
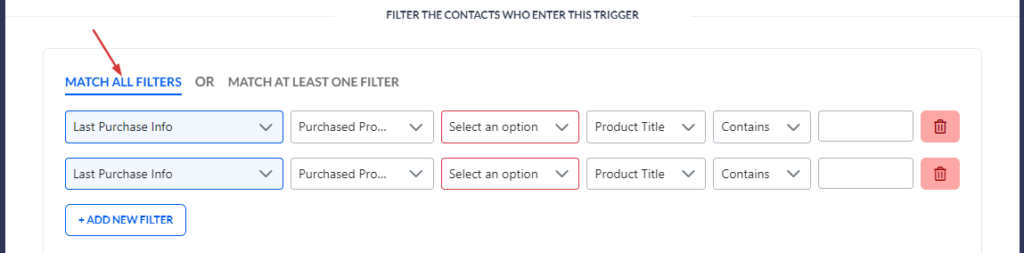
Filtering by a Complete Category
In your trigger's filter box add the filter "Last Purchase Info".
In this filter select: "Purchased Products", then "Category Name", then "Category", then "Contains", and then select the relevant category.
Filtering by a Specific Product
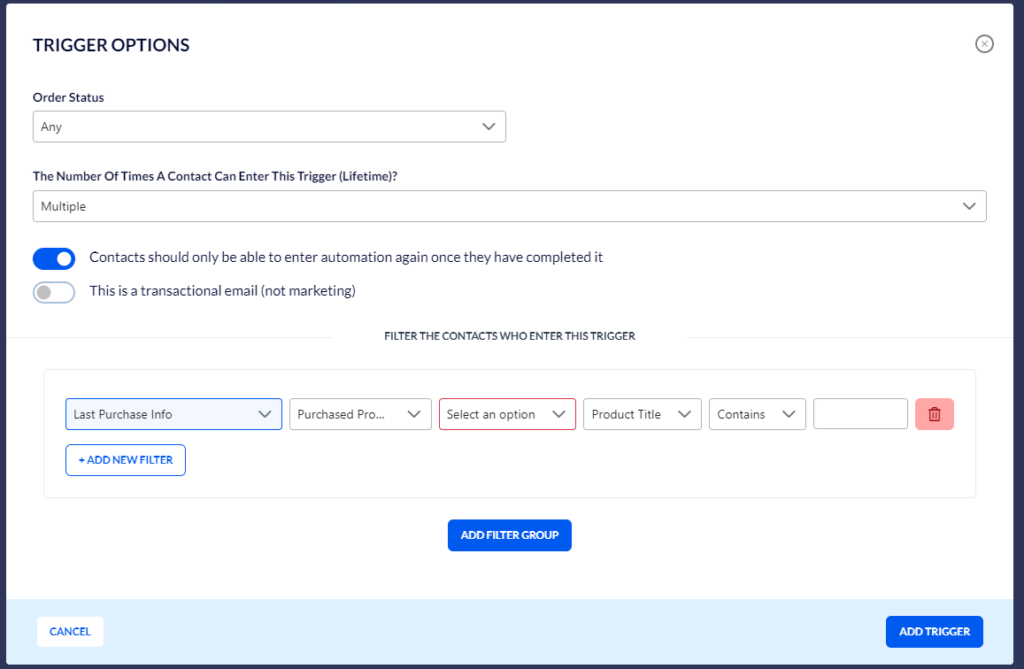
First, take note of how the product is listed on your Product Catalog (as opposed to its "front end" name on your website).
Then select the relevant product catalog, then select "Product title", then select "Contains", and then fill in the name of the product as it is listed in the catalog.
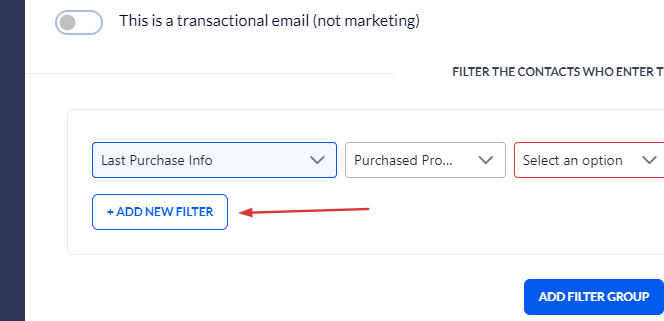
In case several products are relevant you may click "Add New Filter" and add more products in the same manner:
If you add several products you must select "Match At Least One Filter" – so that customers will enter the automation if they buy product X or Product Y:
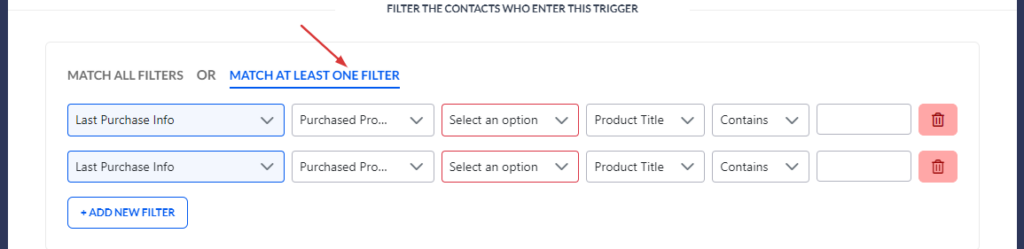
If you wish customers to enter the automation only if they buy both products X and Y- you may select "Match All Filters".
Adding an Action to the Automation
After adding the trigger add the action you wish to take place once the trigger occurs.
Click the blue "+" button:
Add the desired actions, and the rest of the customer journey according to your needs.
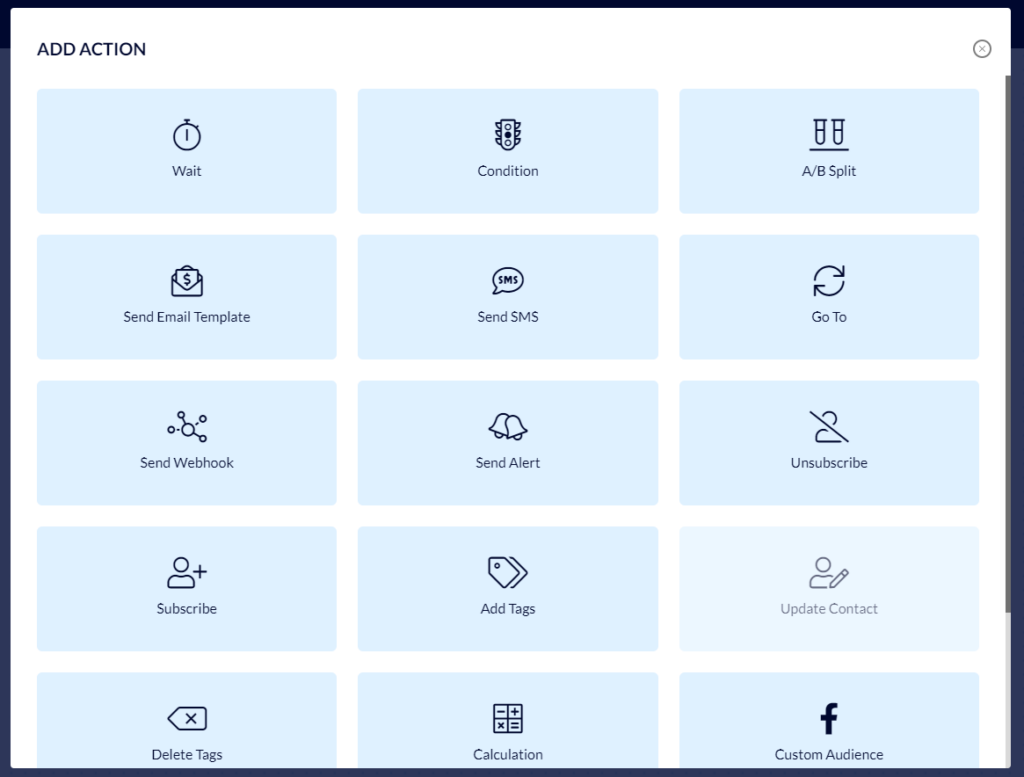
For instance, a hold period of 8 weeks, and then send an email template with a desired message.
In this example customers who purchased the product we selected will enter the automation and receive an email after 8 weeks reminding them to renew their inventory.
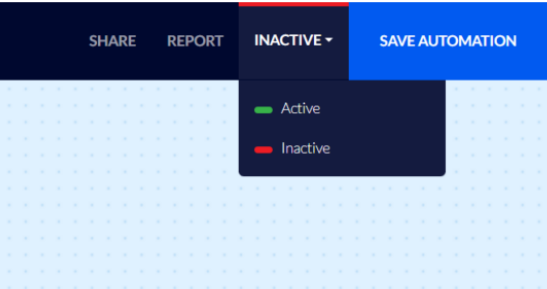
Finally, you can activate the automation by clicking the activation button at the top of the screen and the automation will begin funneling in customers, who will then go through the customer journey you have set up for them.