
Automation Triggers
With Flashy, a dynamic array of automation options is always at your fingertips. This article outlines the many triggers you can choose from when setting up the perfect automation for communicating with your customers.
To view the trigger options:
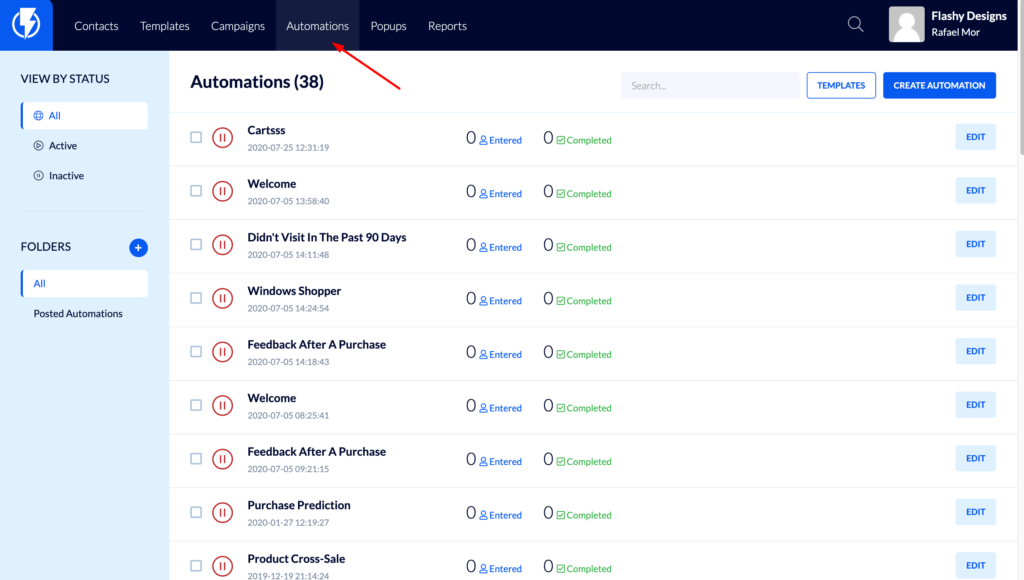
Go to Automations in your Flashy dashboard at the top of the screen.
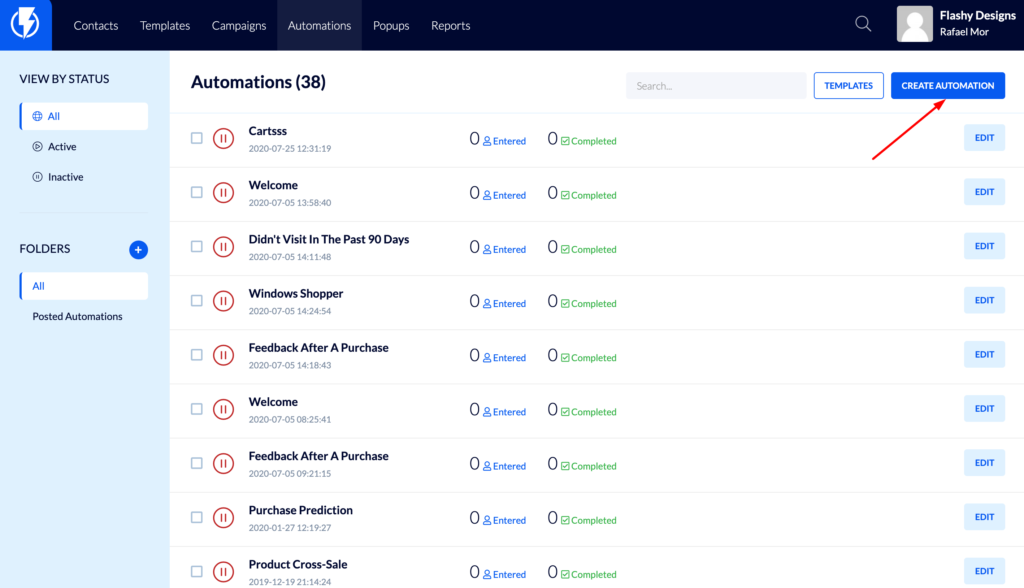
Click on the blue “Create Automation” button in the top-right corner.
Click on “Add Starting Trigger.”
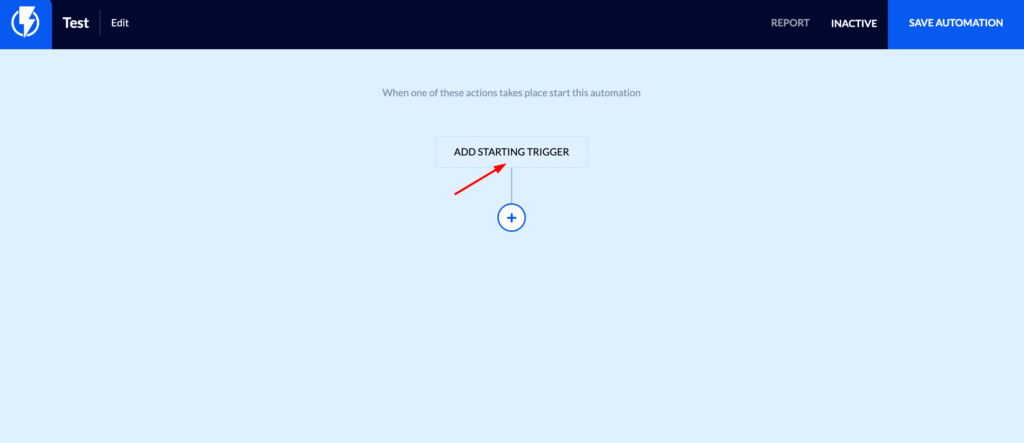
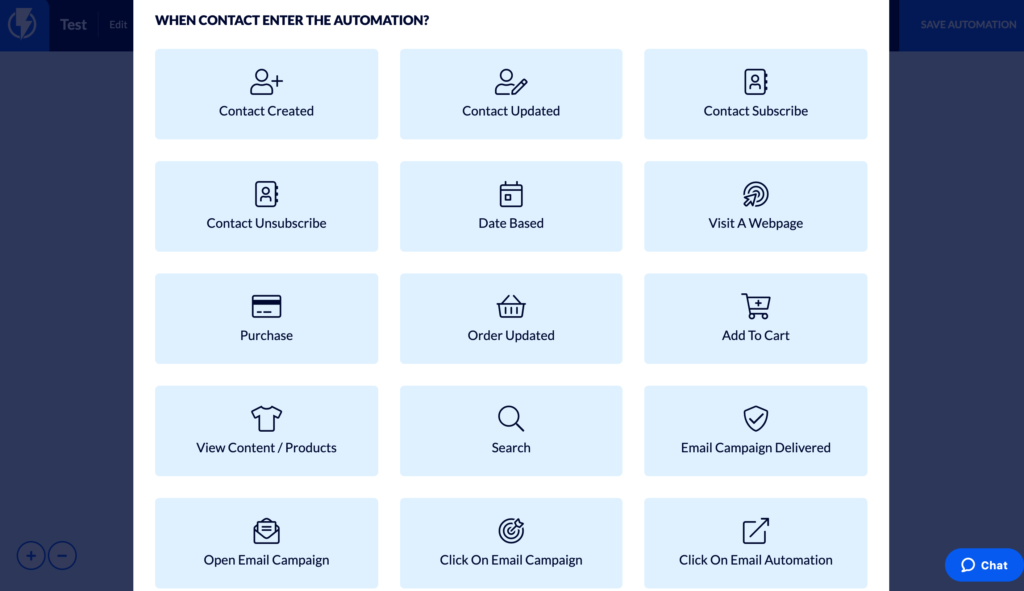
Here you will see all the available trigger options.
Before we explore each trigger, here is an important note that applies to all of them:
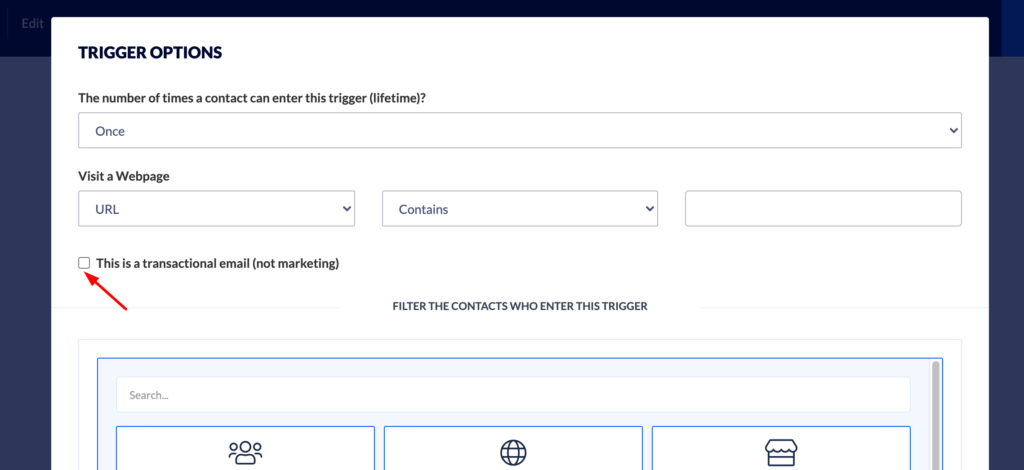
Under the “Trigger Options” heading, there is a checkbox that says “This is a transactional email (not marketing).” You will want to check this box when creating an automation that does not contain promotional material. For example: Say you own a fashion business. You want to create an automation that starts when customers view a page about jeans on your website - it will tag anyone who visits this page as “Jeans Lover.” You should check the transactional box, because the automation is not about sending promotional content. However, if you want to use an automation that sends the customers an email two days later containing promotional content about jeans, leave the box unchecked.
Read on to learn about the exciting capabilities of each trigger!
Contact Created
The Contact Created trigger starts an automation whenever you add a new contact to Flashy.
- To target an audience with specific qualities, you can filter the contacts who enter the automation. A customer will only enter the automation if they meet your specified criteria. For example, if you want to send the automation only to customers in the United States, enter “country” in the filter search bar and fill in the filter fields accordingly.
- It’s important to note that filtering contacts after they enter the trigger is different from setting conditions for the trigger itself. Here we are simply doing some filtering to determine which customers will continue to enter the automation.
- Use Case Example: Notifying another platform that a new contact has been created in Flashy.
Contact Updated
This trigger occurs whenever a contact’s profile is updated in Flashy.
- Choose the profile aspects that will start the trigger in the “Contact Field” dropdown menu - language, or last name, for example. Choose whether the trigger should happen if the update contains, doesn’t contain, equals, or doesn’t equal a specific value. The contact will only enter the automation if these conditions are met.
- Use Case Examples:
- Flashy is integrated with the CRM, so once the CRM detects a contact update, it updates Flashy. An automation is then started based on that update.
- Say your business has a rewards system connected to Flashy. When the rewards system updates a contact with information on their rewards earnings, you might want to start an automation based on it.
Contact Subscribe
You can use this trigger when you want to send an email to contacts who subscribe to your lists.
- Click on the “From List” dropdown menu to connect the trigger to a specific list or choose “Any List” if you want it to apply to all list subscriptions.
- Pay close attention to the dropdown menu entitled “Number of times a contact can enter this trigger (lifetime).” Here you can choose from “Once” or “Multiple.” Select “Once” if you only want a contact to enter the trigger one time, regardless of how many lists he subscribes to. Choose “Multiple” if you want him to enter the trigger every time he subscribes to a list.
- Use Case Example: Nurturing relationships with contacts who sign up to allow you to send them marketing material.
Contact Unsubscribe
This trigger functions the same way as the Contact Subscribe trigger, but is started when contacts unsubscribe from lists.
- Use Case Example: Notifying other systems that the contact has unsubscribed or to communicate this internally within your business.
Date Based
You can set the Date Based trigger to occur based on the timing of a certain event - for example, a contact’s birthday or a certain number of days after a purchase.
- Base the trigger on any of Flashy’s contact fields.
- In the “Send At” dropdown menu, choose from “Relative” or “Set Time”. “Relative” means that the automation will begin at the same time as a previous event. For example, if you want to send an email based on when a contact was last seen visiting your website - say 2:00 pm on a certain day - you can choose to send it on a different day at the same time as the customer visit: at 2:00 p.m.,14 days later (or any desired interval). Use “Set Time” to choose a specific time and select the appropriate time zone.
- In the “Match Type” section, choose “Match Day, Month, and Year” when you are basing the automation on a specific, one-time event. Choose “Match Day and Month” when you want to match recurring dates like birthdays, anniversaries, etc.
- Use Case Examples:
- Post-purchase, to follow up for feedback on the product after a certain interval
- Checking in with customers who haven’t visited your website recently
Visit a Web Page
This trigger is started when a contact visits a specific web page.
- You can choose how many times the contact can enter the trigger - “Once” or “Multiple.” Here it is advisable to choose “Once,” so that the contact isn’t entered into the trigger every time the web page refreshes.
- The trigger can be based either on a specific URL or Page Title.
- Use Case Examples:
- Tagging customers based on the type of web pages they view
- If you sell a type of product that customers tend to research heavily before purchasing - such as car seats - you may want to send an automation to customers two days after they view car seats on your website. The automation could contain a listing of the top five car seats. Handing the customers this valuable information all in one place would save them significant time and effort, and they may be compelled to purchase from your business.
Purchase
This trigger is started immediately after a customer makes a purchase.
- The trigger can occur at any stage of the ordering process. Choose “any” or enter a word pertaining to a specific stage, such as “pending.”
- Use Case Examples:
- Sending order summaries
- Notifying other platforms of the purchase
Order Updated
Use this trigger to send an automation based on order status.
- It is recommended to choose “multiple” for the number of times to send the automation so that it will encompass all updates at every stage of the ordering process.
- The checkbox for Transactional Email should be checked in this trigger as these are order updates, not promotional material.
- Use Case Examples:
- If an order is cancelled, you can send an automation to ask the customer for feedback.
- Notifying customers when their orders have shipped
Add to Cart
This trigger can be used to start an automation every time a customer adds something to their cart.
- Be sure to choose “Multiple” for the number of times to send the automation.
- If a customer is receiving an automation with every item added to their cart, you can set the trigger so that the customer fully completes one automation before receiving the next. In the filter, enter “Contact Automation Status” in the left-hand field. In the center dropdown, choose “Not currently in automation.” In the right-hand dropdown, choose the name of the automation. With these settings, the customer will only be able to begin the next automation when the current one has finished; they will not receive parallel automations.
- Many Flashy customers ask “What is the lifetime of an automation?” An automation begins the second a customer enters it and continues until it has completed the terms specified for it. For example, let’s say you specify that a customer will receive an automation email four days after adding a product to his cart. After four days, he receives the email, and the automation is complete. If he returns to your website a week later and adds another product to his cart, another automation will begin.
- Use Case Examples:
- Sending an automation to a customer who has placed items in their cart and then abandoned it
- Sending an automation to notify a salesperson when a customer has abandoned a cart containing high value items, such as $1,000+ in total. The salesperson can then contact the customer to ask if they need any help completing their purchases.
View Content/Products
Choose this trigger to connect with customers who have viewed your content or products but have not completed the action you want them to take.
- Select “multiple” for the number of times a customer should receive this automation to ensure that they are sent messages containing all of the products they viewed.
- It is again recommended to set the “Contact Automation Status” filter: If a customer is receiving an automation containing every item or piece of content viewed but not acted upon, you can set the trigger so that the customer fully completes one automation before receiving the next. In the filter, enter “Contact Automation Status” in the left-hand field. In the center dropdown, choose “Not currently in automation.” In the right-hand dropdown, choose the name of the automation. With these settings, the customer will only be able to begin the next automation when the current one has finished; they will not receive parallel automations.
- Use Case Examples:
- Tagging customers according to their interests
- Browse abandonment - When a customer views products on your website but doesn’t put them in their cart, you can send them an automation email containing the products they viewed.
Search
This trigger is used to start automations based on specific terms the customer enters into the search bar.
- Enter the words or phrases you want to start the trigger. Select “contains/doesn’t contain/equals/doesn’t equal” regarding the specified search words.
- Use Case Example: If a customer didn’t find what he wanted on your website (i.e. didn’t add any items to their cart), you can send them an automation containing an offer to assist or product recommendations.
Email Campaign Delivered
Select this trigger when you want to begin an automation based on the successful delivery of an email campaign to your customers’ inboxes. The automation will begin only when the customer’s email server accepts the email. This triggers ensures that automations are not sent to email addresses that have bounced, whether a “soft bounce” - the inbox was temporarily unavailable - or a “hard bounce” - the inbox doesn’t exist.
- Select the email campaign you want to connect with the trigger; it can be a specific campaign or “any.”
- Choose how many times the contact will enter the automation.
Open Email Campaign
This trigger starts an automation when a customer opens an email from you.
- Select a specific email campaign or “any.”
- Choose how many times the contact will enter the automation.
Click On Email Campaign
Select this trigger if you want to start an automation when a customer clicks on a link in an email.
- Choose the specific details of the links they’ll click on: a link that contains/doesn’t contain/equals/doesn’t equal certain terms.
Click On Email Automation
This trigger begins an automation when a contact clicks on a link within an email automation (note that this is different from the email campaign trigger above).
- Choose the specific details of the links they’ll click on: a link that contains/doesn’t contain/equals/doesn’t equal certain terms.
- Select the name of the email automation and the specific email template if desired.
SMS Campaign Clicked
Here, an automation begins when a contact clicks on a link in an SMS campaign.
- Choose the specific details of the links they’ll click on: a link that contains/doesn’t contain/equals/doesn’t equal certain terms.
SMS Automation Clicked
Choose this trigger to start an automation when a contact clicks on a link within an SMS automation (note that this is different from the SMS campaign trigger above).
- Choose the specific details of the links they’ll click on: a link that contains/doesn’t contain/equals/doesn’t equal certain terms.
- Select the name of the SMS automation you want to connect with the trigger.
Custom Event
If you need a certain kind of trigger that is not contained within Flashy’s many trigger options, you can create a custom event trigger. It is possible to have 1,000+ events on other platforms that will start an automation on Flashy!
- Use Case Example: You may want to connect Flashy to your business’ support system, such that any time a ticket is opened by your customers, an event is sent to Flashy to start an automation. In the custom event fields, you can enter your event name and whether the ticket contains/doesn’t contain specific terms.
We hope this article has made Flashy’s triggers easy to understand and utilize. Be sure to take advantage of our many powerful trigger options to start automations that produce results for your business!
